Finish Clay Bar Treatment in 45–120 Minutes: Safe Test Spot Steps for DIYers
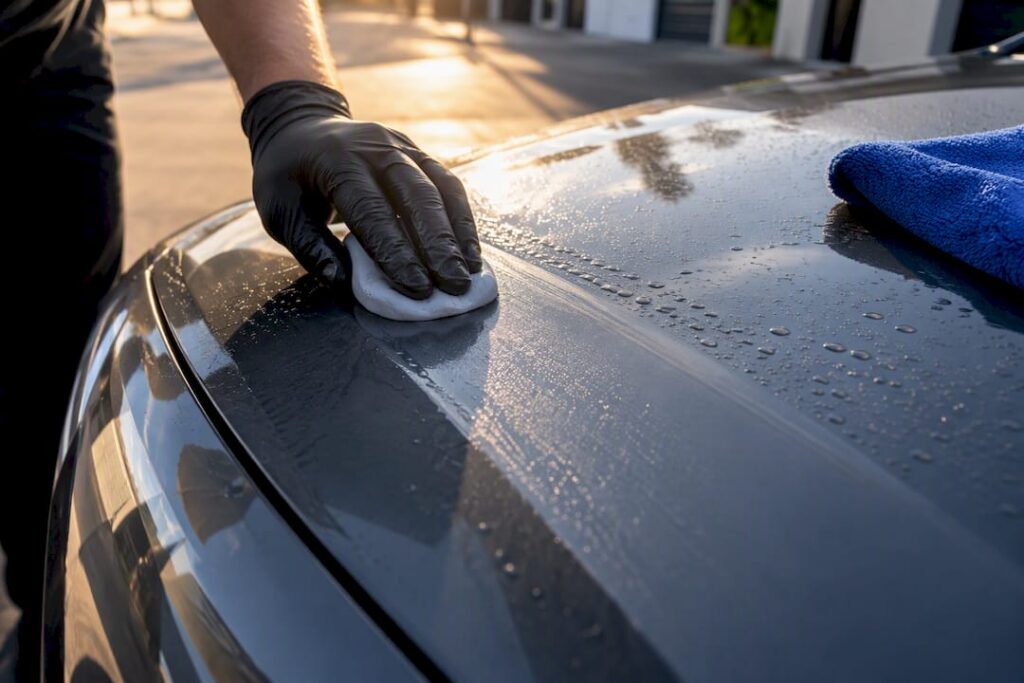
A clay bar treatment lifts bonded contaminants that a wash and soap can’t touch, leaving paint smooth instead of gritty. You need one when a freshly washed panel still feels rough under a clean hand or plastic bag, a quick check detailers call the baggie test. Done right, it preps the surface for polish, wax, or ceramic coating to bond properly.
Table of Contents
- What Clay Bar Treatment Removes and How It Works
- Materials and Product Choices: Clay, Pads, and Lubricant
- How to Use Clay Bar Products: Step-by-Step
- Common Clay Bar Mistakes and How They Damage Paint
- How Often to Clay and When to Call a Pro
- After Claying: Polish, Protection, and Maintenance
- Test-Spot Protocol and Professional Safeguards
- Get a Local Quote for Professional Paint Prep
- Sources
- FAQ
What Clay Bar Treatment Removes and How It Works
A clay bar doesn’t clean paint the way soap does. It physically pulls contaminants that have bonded to the clear coat and sit above the surface, things a wash mitt just glides over. That includes industrial fallout, paint overspray from nearby construction or road work, tree sap mist, tar kicked up from asphalt, and rail dust from parked cars near train tracks.
The clay itself works through light abrasion and tack. As you glide it across lubricated paint, microscopic contaminants embed into the clay’s surface while the paint underneath stays untouched, provided you’re using enough lubricant. It’s a mechanical pickup, not a chemical strip.
What claying does not do is fix swirl marks, water spots, or oxidation. Meguiar’s is explicit on this point: claying removes surface contamination but has no effect on paint defects that live in the clear coat itself, which require polishing or compounding instead. Two product categories handle the pickup differently:
- Traditional clay bars — kneaded by hand, folded to expose a clean face, and discarded once fully loaded with grit
- Synthetic clay pads and mitts — mounted on a block or worn like a mitt, generally easier to handle and more reusable across sessions
Materials and Product Choices: Clay, Pads, and Lubricant
Before touching paint, gather a few essentials: a clay bar or synthetic pad, a clay lubricant (or a compatible quick detailer or waterless wash product), several clean microfiber towels, and your regular car shampoo for the wash beforehand.
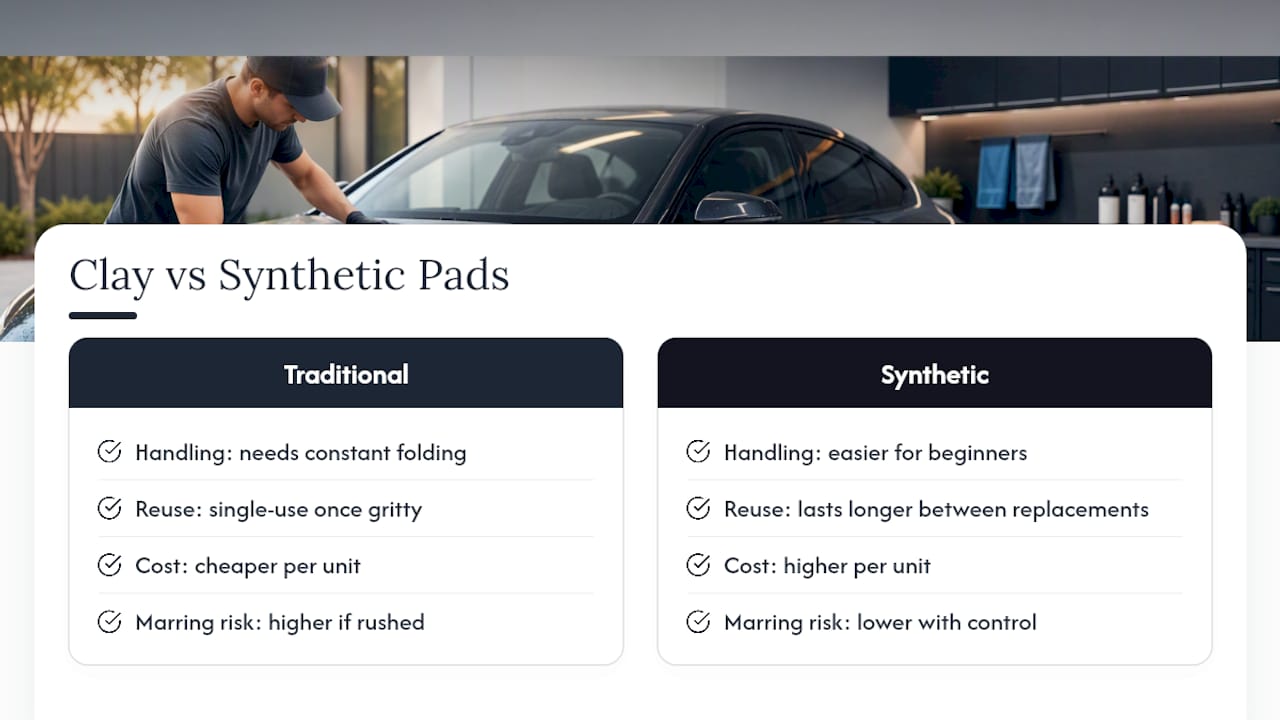
The choice between traditional clay and synthetic pads comes down to handling and grade. Traditional clay is cheap and effective but needs constant folding and gets tossed once it picks up too much grit. Synthetic pads last longer and are easier for beginners to control, though they typically cost more per unit. Both come in mild and aggressive grades. Meguiar’s mild-grade detailing clay is built for routine maintenance, while aggressive grades tackle heavy, embedded contamination at a higher risk of leaving fine marks if you rush the process.
Lubricant is the part people skimp on. Do not substitute rubbing alcohol or dish soap for a proper clay lube. Use whatever the clay manufacturer recommends.
Pro Tip: Meguiar’s specifically pairs its clay with M34 Final Inspection or D155 Last Touch diluted 1:1, according to the brand’s product FAQs. Grabbing whatever spray bottle is on the shelf isn’t a safe substitute.
How to Use Clay Bar Products: Step-by-Step
Claying is slow, methodical work. Rushing it is exactly how people end up with fine scratches instead of smooth paint.
Before you start:
- Wash and dry the car completely. Clay glides on a clean surface; dirt left behind just adds more grit for the clay to drag around.
- Move to the shade or a cool time of day. Hot paint softens clay lubricant too fast and increases friction.
- Pick one small test panel first, ideally something low-visibility like a rear quarter panel, not the hood.
Working the panel:
- Spray the lubricant generously, more than feels necessary. A starved panel is the single biggest cause of marring.
- Flatten a golf-ball-sized piece of clay and glide it back and forth in straight lines with very light pressure, letting the lubricant do the work rather than muscle.
- Fold the clay every 20 to 30 seconds to expose a clean face and bury the grit inside.
- Wipe the residue with a clean, dry microfiber towel before moving to the next section.
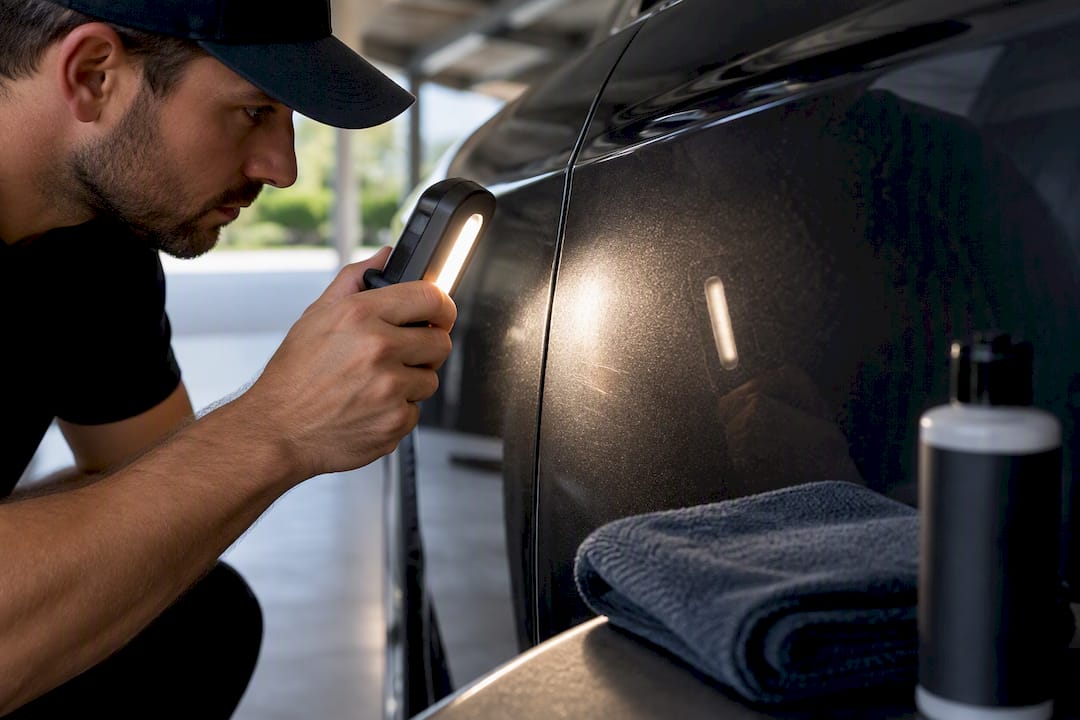
- Inspect the panel under strong direct light or a flashlight before deciding it’s done.
Moving through the car:
Work one small section at a time, roughly two to three square feet, and go panel by panel rather than trying to cover the whole hood in one pass. A full car typically runs somewhere between 45 minutes and two hours depending on how contaminated the paint is and how large the vehicle is. If you drop the clay on the ground, throw it away. Grabbing pebbles or driveway grit and running it back across your paint defeats the entire purpose.
When to stop: Auto Geek’s practitioner guidance recommends treating any drag, squeaking, or visible haze as a signal to stop immediately. Squeaking usually means you’re out of lubricant. Haze after wiping means the clay grade is too aggressive for that contamination level, or you pressed too hard. Either way, the fix is the same: reapply lubricant, switch to a milder clay, and lighten your hand.
Common Clay Bar Mistakes and How They Damage Paint
Most clay bar damage traces back to five habits, and every one of them is avoidable with slower, more deliberate technique.
- Pressing too hard — clay needs almost no downward force; let the lubricant carry it across the surface
- Skimping on lubricant — a dry or under-lubed panel turns the clay into sandpaper
- Working hot paint — direct sun softens both paint and lubricant, raising friction and drag
- Using an aggressive grade unnecessarily — most daily-driven cars only need mild clay
- Reusing dirty or dropped clay — grit trapped or picked up from the ground scratches on contact
Auto Geek forum discussions on clay bar technique consistently point back to these same errors as the root cause of most fine scratching.
Pro Tip: Fold your clay far more often than feels necessary; a fresh face every 20 to 30 seconds is cheap insurance against dragging grit across your clear coat.
If you do spot fine marring after claying, inspect it under bright light before deciding what to do next. A light machine polish can often correct minor marring, but deeper scratches or heavy swirl patterns call for a professional paint correction rather than another pass with clay.
How Often to Clay and When to Call a Pro
There’s no fixed yearly schedule for claying. The right answer depends on your paint’s condition, not the calendar. Run the baggie test after a wash: if the surface still feels gritty, it’s time to clay. Cars parked near rail lines, industrial areas, or construction zones need checking more often than one garaged in a low-fallout neighborhood.
Hiring a professional makes sense in a few specific situations:
- Contamination is heavy or the paint feels rough across most panels, not just one spot
- You’re prepping for paint correction, a ceramic coating, or another step where surface prep needs to be right the first time
- You’re not comfortable with the pressure and lubrication technique and would rather not risk marring the clear coat yourself
DIY claying costs less in dollars but eats an afternoon. A mobile detailer handles the whole job on your schedule and typically pairs it with proper paint correction or coating prep in the same visit.
After Claying: Polish, Protection, and Maintenance
Claying doesn’t finish the job. It sets up the paint for whatever comes next. A properly clayed surface lets polish, wax, sealant, or ceramic coating bond directly to the clear coat instead of contaminants sitting between the product and the paint.
The order matters: wash, clay, then polish if swirls or oxidation are present, then apply your wax, sealant, or coating. Skipping the polish step is fine if the paint is already smooth and defect-free, but skipping claying before a coating risks trapping contaminants under a layer meant to last for years.
- Wash with pH-neutral shampoo to avoid stripping fresh protection
- Avoid automatic car washes with abrasive brushes right after claying
- Reapply a maintenance spray or top-up sealant every few months depending on the product used
- Re-check with the baggie test before your next wax or coating application
Test-Spot Protocol and Professional Safeguards
Manufacturer instructions and practitioner forums agree on a few non-negotiable safeguards before you clay an entire vehicle.
- Test a small, low-visibility panel first using mild clay and generous lubricant
- Stop immediately if the test spot shows haze, drag, or fine marring, and switch to a milder approach
- Keep the clay clean by folding constantly; if it’s dropped or visibly loaded with grit, throw it out rather than risk dragging debris across paint
- Use only the lubricant your clay manufacturer recommends, never an improvised substitute like rubbing alcohol or dish soap
This test-spot habit is the cheapest insurance in the entire process. It costs two minutes and tells you exactly how your specific paint, clay grade, and lubricant combination behaves before you commit to the whole car.
Get a Local Quote for Professional Paint Prep
Heavy contamination, correction-ready prep, or just not wanting to risk your own clear coat are all good reasons to skip the DIY route. Mobiledetailing connects vehicle owners with local mobile detailing professionals who handle clay bar treatments, paint correction, and full exterior detailing at your home or office instead of a shop appointment.
That matters most when contamination is heavy across every panel, when you’re prepping for a ceramic coating and need the surface flawless before it goes on, or when the idea of gliding clay across your own hood makes you nervous. A mobile detailer brings the right clay grade and lubricant for your paint’s condition and does the panel-by-panel inspection work for you. Head to MobileDetailing.io’s quote page to compare local pros and get a quote for clay bar service or full paint prep before your next wax, sealant, or coating application.
Sources
For hands-on instructions, Chemical Guys’ clay bar guide and Meguiar’s FAQ page cover manufacturer-backed technique and lubricant pairing. Always follow the specific product label for your clay and lubricant.
FAQ
What Does a Clay Bar Treatment Do?
It physically removes bonded surface contaminants like industrial fallout, tar, and rail dust that washing alone can’t lift off the paint. It does not remove swirl marks or oxidation, which require polishing instead, according to Meguiar’s product guidance.
How Often Should You Clay Bar Your Car?
There’s no universal schedule. Chemical Guys recommends claying whenever a washed panel still feels gritty under a plastic bag, and checking more often if the car is exposed to heavy fallout or industrial pollution.
What Are the Disadvantages of Using a Clay Bar?
The main risks are technique errors rather than the product itself: too much pressure, too little lubricant, hot paint, or an aggressive clay grade can all cause drag or fine marring. Auto Geek’s forum guidance points to generous lubrication and light pressure as the fix for most of these issues.
How Do I Know if My Car Needs a Clay Bar?
Wash and dry the car, then run a clean hand or plastic bag over the paint. If it feels rough or gritty instead of glass smooth, the surface has bonded contaminants that a clay bar treatment will remove.
Should I DIY or Hire a Professional for Claying?
DIY works fine for routine maintenance on lightly contaminated paint if you’re comfortable with the technique. Heavy contamination, coating prep, or any hesitation about marring risk are good reasons to get a local quote from a mobile detailer through Mobiledetailing.
MobileDetailing.io provides general educational information. Products, surfaces and vehicle finishes vary. Follow manufacturer instructions and consult a qualified detailing professional before using abrasive processes or chemical treatments.