Save Ventilated Seats: Four Step Leather Seat Cleaning to Avoid Damage
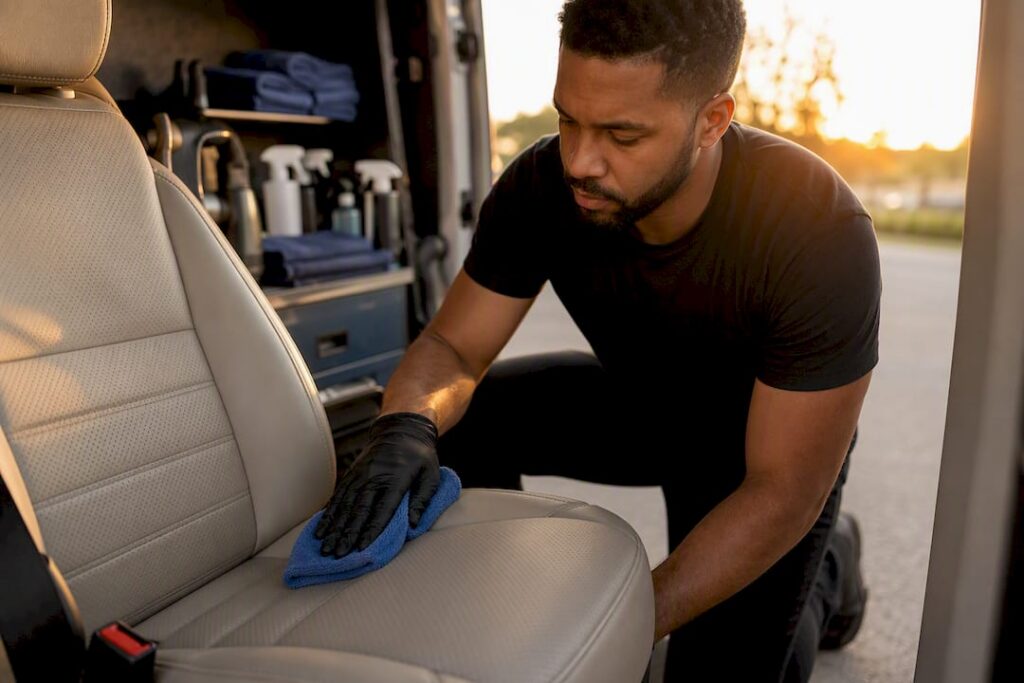
The fastest safe way to handle leather seat cleaning is a four-step routine: vacuum every seam and perforation, wipe with a pH-balanced leather cleaner applied to a towel or brush (never sprayed straight onto the seat), dry immediately, then condition. Always test a hidden spot first, and skip anything that soaks the leather. If you’re looking at cracked seams, torn panels, or heated and ventilated seats acting up, that’s a job for a professional automotive refinishing specialist, not a Saturday afternoon project.
Table of Contents
- What You Need Before You Start Cleaning Leather Car Seats
- How Do You Clean Leather Seats Step by Step?
- How Do You Remove Stains From Leather Seats?
- Why Conditioning and UV Protection Matter as Much as Cleaning
- How Often Should You Clean Leather Car Seats?
- When Should You Call a Professional Detailer Instead?
- Detailed Drying Best Practices After Cleaning
- Get a Local Quote for Leather Seat Care You Can’t DIY
- Sources
- FAQ
What You Need Before You Start Cleaning Leather Car Seats
Half the mistakes people make with leather seat cleaning come down to grabbing the wrong bottle or the wrong towel. Get your supplies lined up first, and the actual cleaning takes ten minutes instead of an hour of trial and error.
Tools:
- A vacuum with a soft brush attachment (hard plastic nozzles scratch the grain)
- At least two clean microfiber towels, one for cleaning and one strictly for drying
- A soft or boar-hair detailing brush for agitating dirt in seams and perforations
- A foam applicator pad for spreading cleaner and conditioner evenly
Products that are actually safe:
- A pH-balanced leather cleaner formulated for coated automotive leather, not household hides
- A water-based leather conditioner made for cars, not furniture wax or shoe cream
- A UV protectant with inhibitors built in, applied after conditioning
What to leave in the cabinet: dish soap, bleach, ammonia-based glass cleaner, acetone, and any silicone-based dressing. Modern car seats are typically pigmented and sealed with a coating, and household cleaners strip that coating or leave a residue that turns tacky, according to AutoDetailPedia’s leather care guidance. Silicone products and high-alcohol cleaners cause the same problem over time.
For deeper damage, a leather repair kit or a can of compressed air for clearing perforation holes can help, but those are stopgaps. If you’re patching cracks or matching color, that’s professional territory.
How Do You Clean Leather Seats Step by Step?
This is the sequence that keeps leather looking right for years instead of degrading after a few aggressive cleaning sessions. Follow it in order. Skipping steps, especially the drying step, is how people end up with mildew smells three weeks later.
- Park in the shade. Direct sun dries cleaner onto the leather before you can wipe it off, and it can soften adhesives on trim pieces.
- Vacuum thoroughly. Get into every seam, the base of the seatback, and every perforation hole. Grit trapped in those spots acts like sandpaper once you start scrubbing.
- Pick a hidden test spot. Try the cleaner on the underside of a seat bolster or the back of a headrest first. Wait a few minutes and check for color change or texture change before treating the visible surface.
- Apply cleaner to the towel or brush, not the seat. This is the rule most DIY guides get wrong. Spraying cleaner directly onto leather lets liquid pool in stitching and perforations, where it can soak into the foam padding underneath, according to CarBuzz’s step-by-step leather cleaning guide. Spray the towel, then wipe.
- Work in small sections. Clean about two square feet at a time. Use small circular motions on flat panels and a gentle side-to-side motion along seams, where a soft brush lifts dirt without forcing it deeper.
- Cut liquid volume on perforated or ventilated seats. Use roughly half the cleaner you’d use on a solid panel and dab rather than rub. Letting damp residue sit in the holes can leave white rings or clog the airflow channels underneath.
- Wipe dry immediately. Don’t let the cleaner air-dry on the leather. A dry microfiber towel should follow right behind the cleaning towel in every section you treat.
- Confirm the surface is fully dry before conditioning. Conditioner applied over damp leather traps moisture instead of restoring oils.
- Apply conditioner in a thin, even layer. Let it absorb for 5 to 10 minutes, then buff off anything that hasn’t soaked in with a clean towel.
The Family Handyman technique of applying cleaner to the applicator instead of the seat is worth repeating because it’s the single most common shortcut people skip when they’re in a hurry, and it’s the one that causes the most long-term damage.
Pro Tip: Keep a second dry towel in reach at all times during cleaning. If you notice cleaner starting to darken or pool anywhere, especially near a seam or a heated-seat control panel, wipe it immediately rather than finishing the section first.
Never let liquid saturate seams near heating elements or ventilation fans. Pooled moisture around those components is one of the more expensive mistakes a DIY cleaning session can produce, since it can short out a heated-seat element or trigger a musty smell that’s nearly impossible to fully remove once it’s in the foam, according to CarBuzz. Skip anything labeled “leather cleaner” that contains high alcohol content or silicone. Both can leave a film that attracts dust or dries the leather out over repeated use.
How Do You Remove Stains From Leather Seats?
Not every stain responds to the standard wipe-and-condition routine. Some need a different approach entirely, and knowing which ones to escalate saves you from making a small problem worse.
- Dye transfer (from jeans or dark clothing): Test a hidden spot first, then use repeated gentle passes with a pH-balanced cleaner rather than one aggressive scrub. Avoid alcohol or acetone-based removers, which can pull pigment out of the leather’s coating along with the transferred dye. If the stain persists after two or three attempts, a professional color-correction service is the more reliable route.
- Grease and food oils: A leather cleaner formulated specifically for grease works better than a general-purpose one. Kitchen degreasers and dish soap strip the leather’s protective coating even as they lift the stain, which is a bad trade.
- Ink: Skip solvents entirely. Ink that’s set into the grain often needs professional color correction, since scrubbing tends to spread the stain across a wider area before it lifts.
- Pet messes and food spills: Treat these like any other stain, clean promptly, and don’t let liquid sit.
- Odors: A proper clean-and-condition cycle resolves most smells on its own. For anything lingering, sprinkle baking soda across the seat, let it sit overnight, then vacuum it up before your next cleaning pass. According to CarBuzz, lingering musty odors after a thorough clean often point to trapped moisture in the padding, which usually means a professional extraction is the fix, not another round of surface cleaning.
Why Conditioning and UV Protection Matter as Much as Cleaning
Cleaning strips oils out of leather along with the dirt. Conditioning is how you put those oils back, and skipping it is why leather that gets cleaned regularly still ends up dry and cracked within a year or two. The three-step system of clean, condition, protect is the standard workflow recommended by AutoDetailPedia, and each step does something the others don’t.
Use a conditioner made for automotive leather, not a household leather cream or anything with an animal-fat base. Those products are formulated for uncoated furniture leather and tend to sit on top of a car seat’s sealed coating instead of absorbing into it.
- Apply conditioner in a thin, even coat across the panel.
- Let it absorb for 5 to 10 minutes.
- Buff off every trace of residue. A seat that still feels tacky or greasy after conditioning has too much product on it.
- Finish with a UV protectant that includes UV inhibitors, and pair it with a sunshade on the dash for parked cars.
Pro Tip: If your seats feel slightly damp or greasy an hour after conditioning, you applied too much. Wipe the excess off with a dry towel rather than letting it sit, since a heavy film attracts dust and dirt faster than bare leather does.
Reapply conditioner every few months under normal use, and more often if the car sits in direct sun most days. A greasy sheen or a slippery feel on the seat surface is the tell that you’ve overdone it.
How Often Should You Clean Leather Car Seats?
A workable maintenance schedule keeps leather from ever reaching the point where it needs aggressive cleaning or professional repair.
- Weekly: A quick dust wipe with a dry microfiber towel keeps grit from grinding into the grain between deeper cleans.
- Monthly: A light clean with pH-balanced cleaner handles everyday grime before it sets in.
- Every 3 to 4 months: A full conditioning pass restores oils and keeps the leather supple.
Vehicles that see kids, pets, or a lot of outdoor use need this schedule tightened up, sometimes to biweekly cleaning and monthly conditioning. Small daily habits matter more than any product: keep keys, pens, and anything sharp off the seat surface, wipe spills the moment they happen instead of letting them set, and consider seat covers for a vehicle that hauls muddy gear or wet dogs regularly.
When Should You Call a Professional Detailer Instead?
Some leather problems are outside the scope of a home cleaning kit, no matter how good your technique is. Deep cracks, tears in the seam, extensive dye transfer that’s soaked into the grain, or anything involving heated and ventilated seat electronics all call for a professional’s tools and experience. Pros use controlled drying methods and minimal-liquid extraction specifically to avoid saturating padding or damaging the wiring inside ventilated seats, a risk that’s much harder to manage with a spray bottle and a towel at home, according to CarBuzz.
A qualified mobile detailer typically brings:
- Color-matching and re-dyeing capability for faded or transferred-stain panels
- Structural foam repair for seats that have started to sag or crack at stress points
- Perforation-safe extraction equipment that won’t force moisture into vent channels
- Experience diagnosing whether a smell or stain is surface-level or embedded in the padding
Before requesting a quote, ask a detailer how they handle ventilated seats specifically, what their drying process looks like, and whether they can color-match a repair to the rest of the interior. Have a few clear photos of the damage and a short description ready. It saves everyone time and gets you a more accurate estimate.
Detailed Drying Best Practices After Cleaning
Drying is where a lot of otherwise careful cleaning jobs go wrong, mostly because people rush it. Leather that still holds moisture when you apply conditioner traps that moisture underneath, which is a setup for a musty smell weeks later or a conditioner that never fully absorbs.
After wiping down each section, run a dry microfiber towel over it a second time before moving on. Don’t wait until the whole seat is cleaned to start drying. By then, the first sections you cleaned have had ten or fifteen extra minutes for cleaner to sit and potentially seep into seams.
Check seams and perforation holes specifically. These are the spots where moisture lingers longest, since surface tension pulls liquid into the stitching and holes rather than letting it evaporate off a flat panel. A cotton swab or a small dry brush can help pull residual dampness out of tight perforation channels.
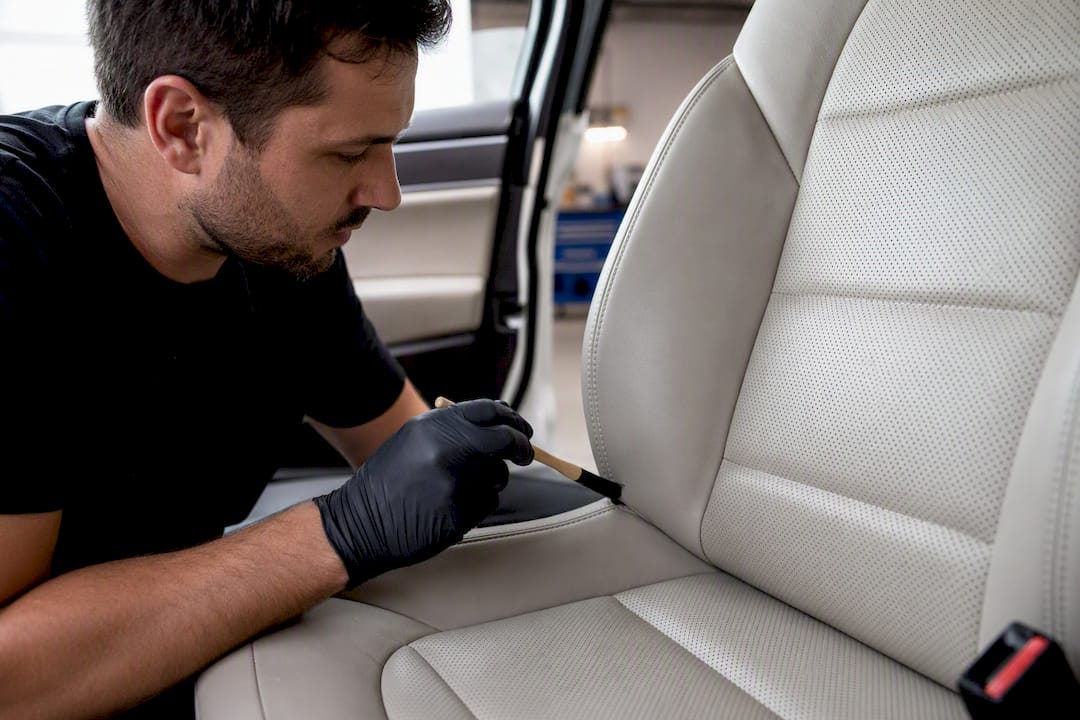
Give the seat time between drying and conditioning, not just a quick pass with a towel. Touch the leather in a few spots, run a dry hand across it, and if it feels even slightly cool or damp compared to the rest of the seat, give it more time. Parking with the windows cracked in a shaded, ventilated spot speeds this along without adding heat that can stress the coating.
Skipping straight from a damp cleaning pass to conditioner is one of the more common reasons conditioner ends up sitting on top of the leather as a greasy film instead of soaking in the way it’s supposed to.
Get a Local Quote for Leather Seat Care You Can’t DIY
If your seats need more than a weekend cleaning session, whether that’s a crack that’s started to spread, dye transfer that won’t lift, or a ventilated seat that needs work no spray bottle should touch, MobileDetailing.io connects you with vetted local mobile detailers who handle exactly that kind of job.

MobileDetailing.io is a nationwide directory, so instead of guessing which shop in your area actually does leather restoration well, you search by location and compare detailers who list interior detailing services, photos, and reviews directly on their profiles. Click through when you’re dealing with restoration work, crack repair, color-matching, or any ventilated-seat issue where a mistake could mean a real repair bill instead of a cleaning bill.
Before you request a quote, snap a few clear photos of the damaged area, note your vehicle’s age, and write a short description of what’s going on, whether it’s a stain that won’t budge or a seam that’s starting to split. That prep gets you a faster, more accurate quote. Head to Mobiledetailing and get matched with a detailer near you.

Sources
Technique and safety guidance above draws on AutoDetailPedia’s leather care system, Family Handyman’s cleaning walkthrough, CarBuzz’s step-by-step guide, and Car and Driver’s tested product roundup. For professional help, visit Mobiledetailing.
- How Do You Clean Leather Car Seats Without Damaging Them? – AutoDetailPedia
- How to clean leather car seats the right way | Family Handyman
- How To Clean Leather Car Seats: A Step-By-Step Guide To Doing It Right – CarBuzz
FAQ
What is the best way to clean leather car seats?
Vacuum thoroughly, test a hidden spot, apply a pH-balanced leather cleaner to a towel or brush (never directly to the seat), wipe dry immediately, then condition once the leather is fully dry.
Can I use Dawn dish soap to clean my leather seats?
No. Dish soap strips the protective coating on modern automotive leather and can dry it out, leading to cracking over time; use a cleaner made specifically for coated leather instead.
What household items can I use to clean my leather car seats?
Stick to a soft microfiber towel and a soft brush for tools, but avoid household chemical cleaners like bleach, ammonia, or acetone; a dedicated leather cleaner is worth the small cost.
How often should I clean and condition my leather seats?
A light clean monthly and a full conditioning treatment every three to four months works for most vehicles, with more frequent care for cars used heavily by kids or pets.
When should I stop trying to clean leather seats myself and call a professional?
Call a professional detailer for deep cracks or tears, extensive dye transfer, odors that persist after cleaning and conditioning, or any issue involving heated or ventilated seat components.
MobileDetailing.io provides general educational information. Products, surfaces and vehicle finishes vary. Follow manufacturer instructions and consult a qualified detailing professional before using abrasive processes or chemical treatments.