Manufacturer Backed RV Roof Cleaning That Preserves Seals
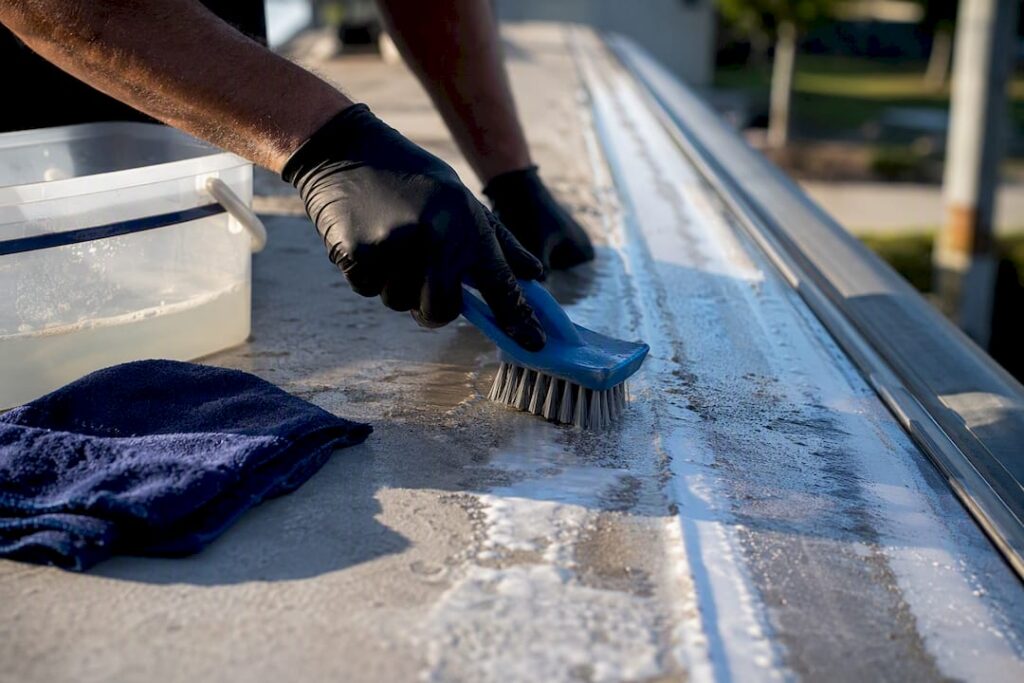
The safest method for cleaning an RV roof is a roof-compatible cleaner, a soft-bristle brush, and a low-pressure rinse, working in small sections. Skip anything with petroleum solvents or citrus degreasers, especially on rubber roofs, and think twice before reaching for a pressure washer. Once the roof is clean, check the seams and lap sealant. If you spot cracking, bubbling, or a roof you’re not sure is safe to walk on, that’s the point to call a professional instead of pushing forward solo.
Table of Contents
- What Roof Material Do You Have, and Why Does It Matter?
- Which RV Roof Cleaners Are Safe, and Which Ones Ruin Rubber Roofs?
- How Do You Clean an RV Roof Step by Step?
- How Do You Inspect and Reseal an RV Roof After Cleaning?
- How Often Should You Clean and Inspect an RV Roof?
- What Safety Precautions Matter Most on an RV Roof?
- When Should You Hire a Professional for RV Roof Work?
- Get Matched With a Mobile RV Detailer
- Sources
- FAQ
What Roof Material Do You Have, and Why Does It Matter?
Before you buy a single bottle of cleaner, find out what your roof is made of. Check the owner’s manual first. If that’s long gone, look at the surface: EPDM rubber has a slightly textured, matte black or white finish and feels a bit like a thick pond liner. TPO looks similar but is usually bright white and has a smoother, almost plastic sheen. Fiberglass is rigid and glossy. Aluminum roofs are rare on newer coaches but show up on some older travel trailers, and they’re rigid metal with visible seams.
The material dictates what you can safely use on it:
- EPDM and TPO are the most chemically sensitive. Petroleum-based cleaners and citrus degreasers can cause swelling, softening, or premature cracking.
- Fiberglass and aluminum tolerate a wider range of cleaners, including some mild degreasers, though harsh abrasives can still dull a fiberglass gel coat.
- PVC roofs are more chemical-resistant than rubber but still shouldn’t be treated with strong solvents.
Walkability matters too. Some roofs are rated to support a person’s weight directly; others need plywood spread across the surface, or a cleaning approach entirely from a ladder. If you don’t know your roof’s walkability rating, treat it as non-walkable until you confirm otherwise.
Which RV Roof Cleaners Are Safe, and Which Ones Ruin Rubber Roofs?
Manufacturer guidance is blunt on this point. Dicor, which supplies EPDM roofing to most major RV brands, warns against cleaners containing petroleum solvents, harsh abrasives, or citric-based ingredients, because these can cause the membrane to swell or degrade and can void the roof’s warranty. There’s no safe dilution of a petroleum-distillate cleaner on EPDM. It’s not a matter of using less; it’s a matter of not using it at all.
For everyday cleaning, a few widely available products do the job without the risk:
- Diluted Dawn dish soap in warm water is mild enough for regular EPDM and TPO cleaning and cuts through everyday grime effectively.
- Murphy Oil Soap, diluted per the label, is another gentle option many RV owners rely on for routine washes.
- Simple Green, used with a soft car-cleaning brush and a thorough rinse, handles moderate dirt and light mildew.
- Dedicated rubber roof cleaners, sold specifically for EPDM and TPO, are worth the extra cost for roofs with heavy oxidation or stubborn stains.
Before committing to a full wash, test any new cleaner on a small, inconspicuous patch and wait a few minutes to check for discoloration or softening. Reading the product’s safety data sheet takes two minutes and tells you exactly what’s in the bottle. And whatever you use, rinse it completely. Leftover soap residue doesn’t just look dull. It can interfere with sealant adhesion later, which becomes a real problem if you need to reseal a seam down the road.
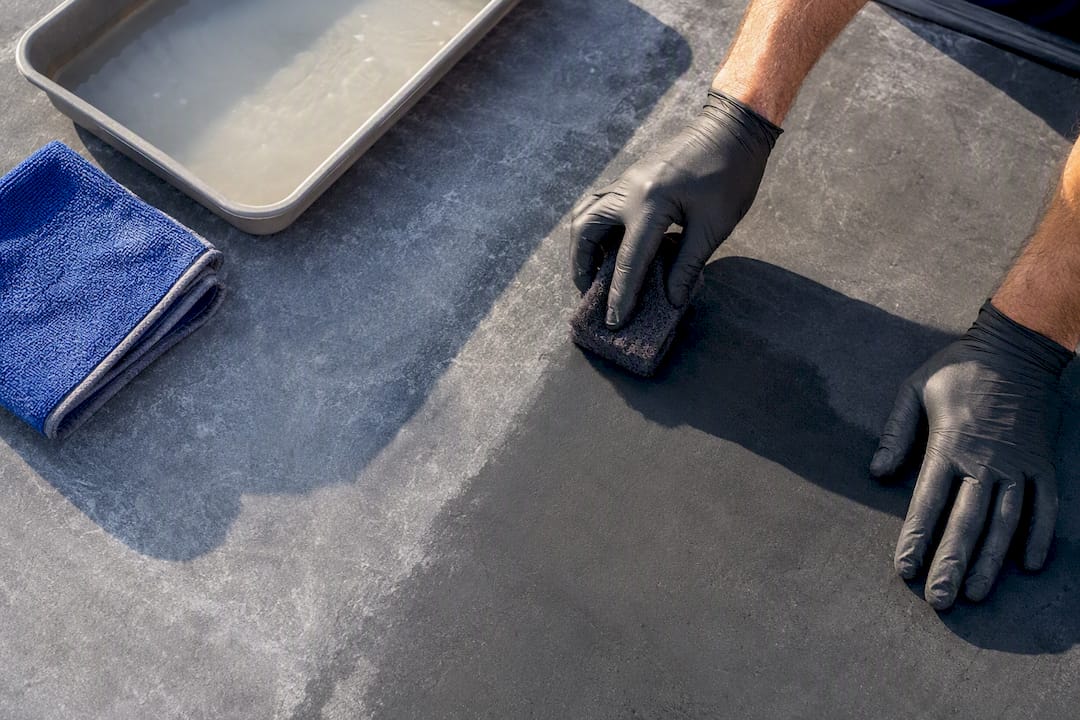
Pro Tip: If your roof has white, chalky oxidation, that’s normal weathering on EPDM, not dirt. It usually needs a bit more scrubbing pressure with a non-abrasive pad to lift, especially before resealing or recoating.
How Do You Clean an RV Roof Step by Step?
Gather your tools before you climb up: a soft-bristle brush or car wash brush, a bucket, your chosen cleaner, a garden hose with a low-pressure nozzle, non-slip shoes, and, if the job takes more than a few minutes, a spotter on the ground. Never climb onto a roof alone if you can avoid it.
- Rinse the entire roof first with plain water to knock off loose dirt, leaves, and grit before any soap touches the surface.
- Mix your cleaner according to the label, whether that’s diluted Dawn, Murphy Oil Soap, or a dedicated rubber roof product.
- Work in small sections, roughly 4 to 6 feet at a time, applying cleaner and scrubbing gently with the soft brush.
- Rinse each section before the cleaner dries. Letting soap sit and bake in the sun makes it harder to remove and can leave streaking.
- Rinse the sidewalls immediately after the roof. Dirty runoff left to dry on the coach sides causes black streaks that are far more annoying to remove than the roof grime itself.
- Move slowly and carefully around vents, skylights, and seams. These areas collect grime in tight corners and don’t tolerate aggressive scrubbing.
- Let the roof air dry, then walk the surface (if it’s rated for foot traffic) to inspect it while it’s clean and easy to see clearly.
If your roof isn’t rated for walking, do the whole process from a stable ladder using a long-handled soft brush, moving the ladder as needed. That’s slower, but it’s the safer trade. If you’re not confident about your footing, your roof’s condition, or how to reach certain spots safely, that’s a legitimate reason to bring in a professional rather than improvise.
How Do You Inspect and Reseal an RV Roof After Cleaning?
A clean roof is only half the job. The other half is making sure the seals that keep water out are still doing their job, because small sealant cracks are one of the most common sources of expensive interior leaks.
Once the roof is dry, walk the seams (if walkable) or inspect from a ladder, checking:
- Around vent bases, skylights, and antenna mounts for cracking, gaps, or sealant that’s pulled away from the surface.
- Along roof edges and seams where sections of membrane meet.
- Inside the RV, on ceilings and around windows, for water stains or soft spots, which often show up before you’d ever spot the source on the roof.
If you find small cracks, self-leveling lap sealant works on flat, horizontal seams, while non-sag sealant is made for vertical or angled surfaces like around vent stacks. Before applying either, the surface has to be completely free of soap residue. Professionals typically wipe seams with isopropyl alcohol and let the area dry fully, since leftover cleaner residue keeps new sealant from bonding properly.
If you’re unsure whether your roof material is compatible with a given sealant, if you find a large tear, or if the membrane looks like it’s bubbling or separating from the substrate, stop and call a professional. Those aren’t good DIY test cases.
How Often Should You Clean and Inspect an RV Roof?
| Task | Recommended frequency |
|---|---|
| Full roof cleaning | 2 to 4 times per year |
| Seam and sealant inspection | At least twice a year, plus after long trips or storms |
| Spot resealing | As soon as cracks or gaps appear |
| Full recoat (for heavy chalking or aging membranes) | Every few years, based on roof condition |
Industry maintenance guides generally recommend this 2 to 4 times a year cleaning cadence paired with twice-yearly inspections, and the reasoning is straightforward: catching a failing seam early costs a tube of sealant, while catching it late can mean replacing water-damaged interior paneling. RVs stored under trees, kept in humid climates, or used for frequent long-distance travel need cleaning and inspection on the higher end of that range. If chalking has gotten heavy or the membrane looks worn overall, a full recoat may make more sense than continued spot repairs, and that’s typically a job worth pricing out with a professional before deciding whether to tackle it yourself.
What Safety Precautions Matter Most on an RV Roof?
Falls and chemical exposure are the two real risks here, and both are avoidable with basic precautions.
- Keep three points of contact when climbing, use a spotter, and wear non-slip shoes.
- Never walk on a wet membrane. Wet rubber and fiberglass are far more slippery than they look.
- Avoid pressure washing. Pressure washers can damage seals, decals, and caulking, and most experts recommend skipping them entirely or using very low PSI only if the manufacturer specifically allows it, and never aim any pressure directly at a seam.
- Wear gloves and eye protection when handling concentrated cleaners, and be mindful of where soapy runoff drains, especially near storm drains or grass.
When Should You Hire a Professional for RV Roof Work?
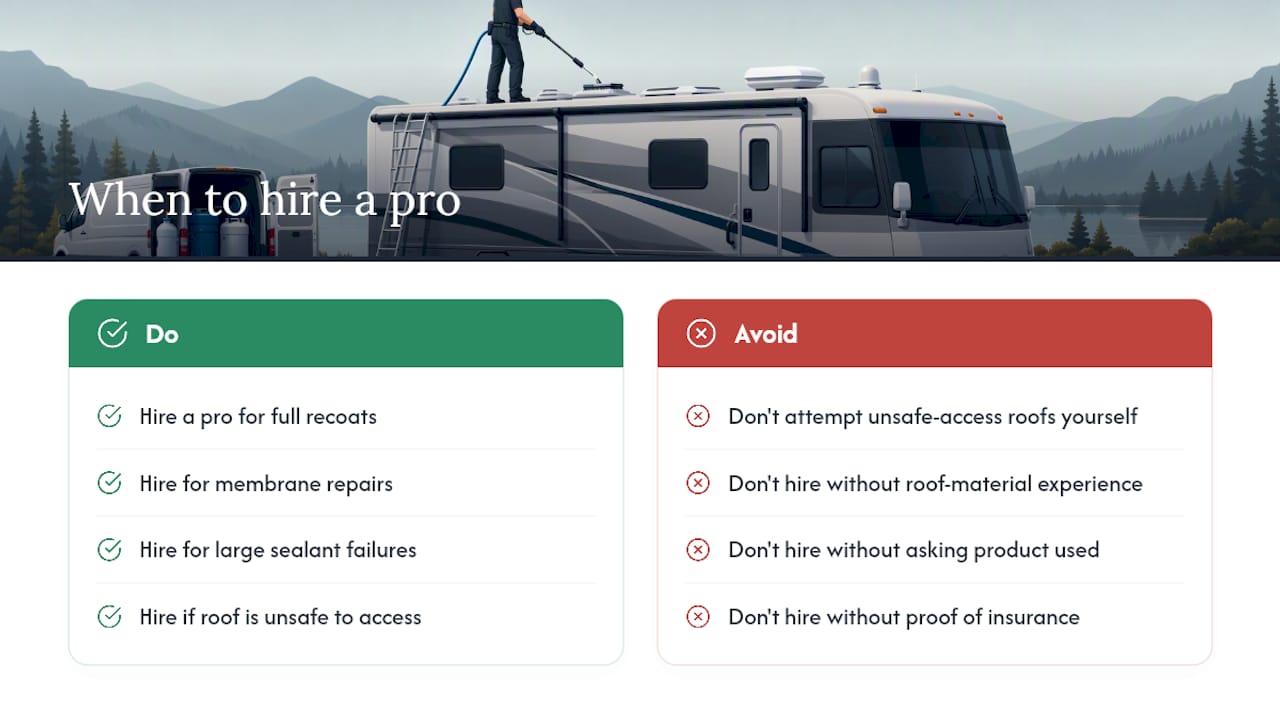
Some jobs go beyond a weekend DIY project. Full recoats, membrane repairs, large sealant failures, and roofs you can’t safely access are all better left to someone with the right equipment and experience. Before hiring, ask about experience with your specific roof material, which sealant or coating products they use, and proof of insurance.
Mobiledetailing lets you compare local mobile detailers who handle RV exterior work, so you can find someone qualified before committing to a repair.
Get Matched With a Mobile RV Detailer
Cleaning your own roof twice a year is manageable. Diagnosing a bubbling membrane, resealing a failing seam correctly, or recoating a chalked-out roof is a different level of job, and it’s where a professional earns their fee. Mobiledetailing is a directory built to connect you with local mobile detailing professionals instead of leaving you to cold-call shops or guess at reviews.

Search by location, compare providers offering exterior detailing and full-service detailing for RVs, and see their photos and reviews before you reach out. That beats scrolling through generic search results hoping a business actually works on RV roofs. When you’re ready to line up quotes for a reseal, a recoat, or a deep clean you’d rather not do from a ladder yourself, request a local quote and compare what providers near you offer.
Sources
For hands-on verification, Dicor’s EPDM care and maintenance guidance and Simple Green’s rubber roof cleaning steps are both worth a direct read.
- How to Clean a RV Rubber Roof — Simple Green
- RV roof maintenance: clean, inspect, and reseal schedule — The Roofing Brief
- Is pressure washing an RV safe? — RVBlogger
- Rv
FAQ
What Is the Best Thing to Clean an RV Roof With?
For most EPDM and TPO roofs, diluted Dawn dish soap, Murphy Oil Soap, or a dedicated rubber roof cleaner applied with a soft-bristle brush works well. Dicor specifically warns against petroleum-solvent and citrus-based cleaners on EPDM, so stick to mild, roof-labeled products.
Can I Use Dawn Dish Soap to Wash My RV Roof?
Yes, diluted Dawn dish soap is a commonly used, mild option for routine RV roof washing on EPDM, TPO, and most other roof materials. Rinse thoroughly afterward, including the sidewalls, so soap residue doesn’t dry into streaks or interfere with future resealing.
Is It Okay to Pressure Wash an RV Roof?
Generally, no. Pressure washers can damage seals, decals, and caulking, so most guidance recommends sticking to a garden hose with low water pressure unless your manufacturer explicitly states otherwise.
How Often Should You Clean Your RV Roof?
Most maintenance guides recommend cleaning an RV roof 2 to 4 times a year, with seal inspections at least twice a year. RVs parked under trees or used heavily in humid climates often need cleaning on the more frequent end of that range.
When Should I Call a Professional Instead of Cleaning My Own RV Roof?
Call a professional for large sealant repairs, full roof recoats, membrane damage, or any roof you can’t access safely. You can compare local mobile detailers through Mobiledetailing and get quotes before deciding how to handle the job.
MobileDetailing.io provides general educational information. Products, surfaces and vehicle finishes vary. Follow manufacturer instructions and consult a qualified detailing professional before using abrasive processes or chemical treatments.