Ceramic Coating Prep: The Full Sequence, Step by Step
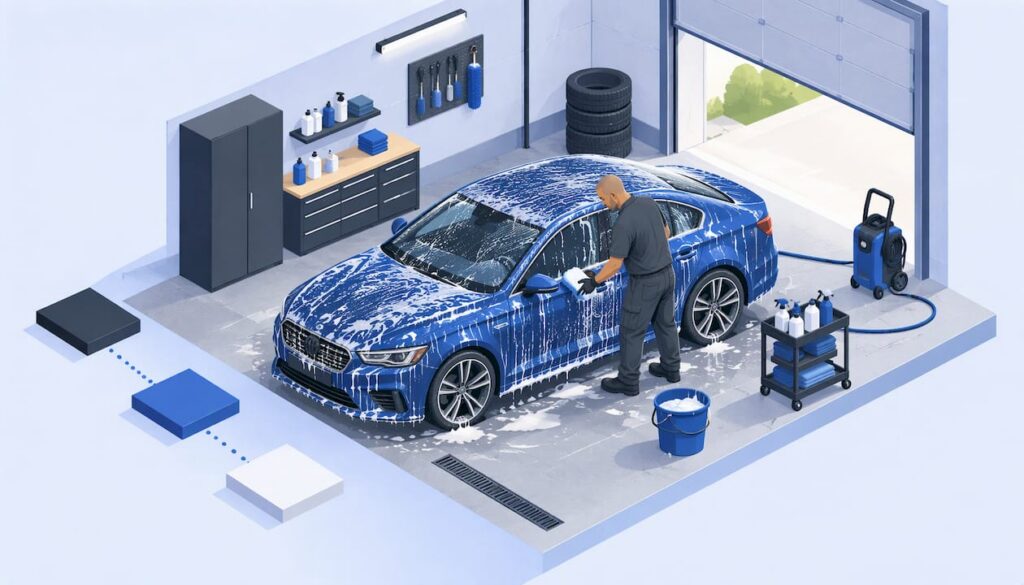
Ceramic coating prep comes down to four jobs, in this order: wash the car, remove bonded contamination, correct the paint as far as its condition calls for, and wipe every panel clean of oils right before the coating goes on. The coating bonds to whatever is on the surface. Whatever is under it stays there, so prep decides how the finish looks and how well it lasts.
This guide walks through each step, explains how much polishing a car needs, covers the conditions that matter on the day, and shows which parts are safe to do yourself and which belong with a professional.
Table of Contents
- Why prep matters more than the coating itself
- The prep sequence at a glance
- Step 1: Wash the car properly
- Step 2: Decontaminate chemically
- Step 3: Clay the paint and use the baggie test
- Step 4: Decide how much polishing the car needs
- Step 5: Remove polishing oils with a panel wipe
- Step 6: Check the surface and the conditions
- Adjusting prep for different situations
- DIY prep or hire a professional?
- Find a local detailer for prep and coating
- FAQ
- Sources
Why prep matters more than the coating itself
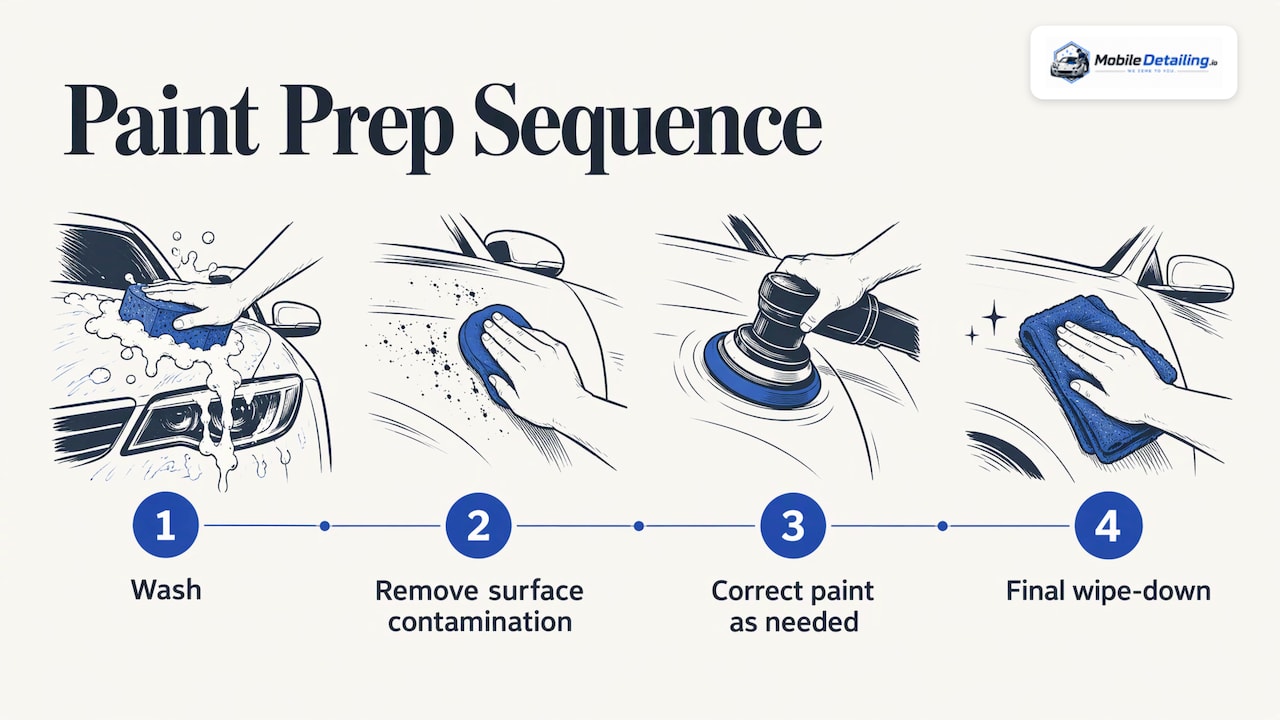
Coating makers agree on the basics. One manufacturer’s prep guide says to remove oils, residue, old coatings, waxes and sealants, then decontaminate and correct the paint so the coating can bond to a bare, uniform surface. Another compares prep to the groundwork in painting: it is the most time-consuming part and the most critical, and its four-part sequence is wash, remove surface contamination, correct the paint as needed, then do a final wipe-down.
Those are manufacturer instructions, not independent lab testing. They are still the instructions the coating’s warranty and directions are written around, and they line up with each other. That is why they are a reasonable guide.
The practical consequence is that a coating locks in the paint’s condition. Swirls, scratches and water spots stay visible under a clear, hard layer. One professional training guide states that professional coating warranties require a documented correction step for this reason. Whether a given installer’s warranty works that way is something to confirm with that installer.
The prep sequence at a glance
| Step | What it does | Typical tools |
|---|---|---|
| 1. Wash | Removes loose dirt, road film and grime | Rinse, pH-neutral soap, clean mitts |
| 2. Chemical decontamination | Dissolves iron particles, tar and mineral spotting | Iron remover, tar remover, water spot remover |
| 3. Mechanical decontamination | Pulls out bonded contaminants | Clay bar, clay mitt or clay towel |
| 4. Paint correction | Removes swirls, scratches and etching | Machine polisher, pads, polish |
| 5. Panel wipe | Strips polishing oils so the coating bonds | Panel prep spray, clean microfiber |
| 6. Condition check | Confirms the surface is clean, dry and cool | Lighting, a gloved hand, a thermometer |
Step 1: Wash the car properly
Start with a thorough rinse, then wash. One prep guide says to rinse first and wash with a basic car wash soap, not a soap with ceramic additives, to limit products that might repel the coating. Another recommends a pH-neutral shampoo with no additives, then clay, and then drying extremely well.
Do the wheels, wheel wells, door jambs and panel gaps too. Dirt left in the gaps tends to run out later and spoil a freshly prepped panel.
If you live where roads are salted, the water is hard, or the weather is extreme, plan for more than a basic wash. The same manufacturer says its water spot remover and iron remover steps are almost mandatory in places with extreme weather, hard water or de-icing chemicals.
Step 2: Decontaminate chemically
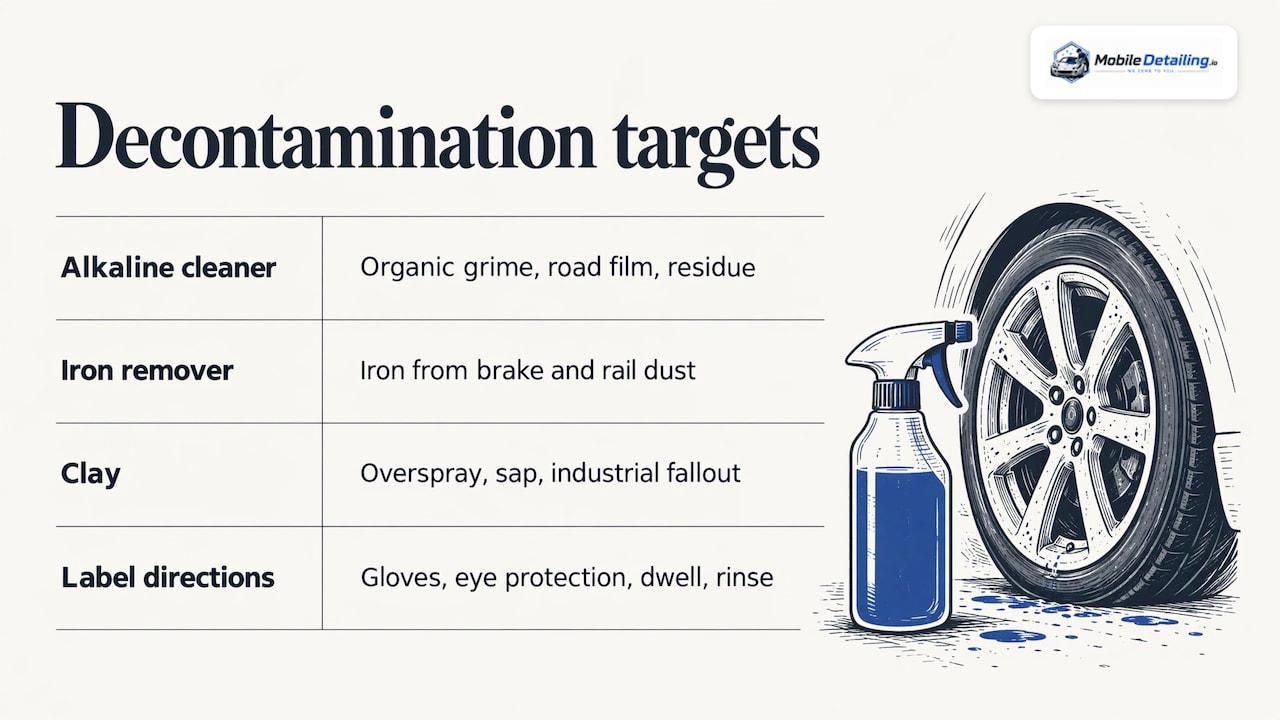
Washing removes what sits loosely on the paint. It does not remove what has bonded to it. Different deposits need different chemistry: one manufacturer recommends both acid-based and alkaline-based cleaners during prep, with an alkaline cleaner suited to organic grime, road film and residue.
The most common bonded contaminant is iron from brake dust and rail dust. It shows up as tiny orange or rust-colored specks, especially on light paint and around the wheels. Iron removers react with it and leave the paint cleaner before any claying. For a closer look at how that works and when it is worth doing, read our guide to iron removal for car paint.
Iron removers, acid cleaners and tar removers are chemicals that can irritate skin and eyes and can stain trim or damage wheels if misused. Follow the product label for gloves, eye protection, dwell time and rinsing. If you are unsure which product is safe for your paint, wheels or trim, hand that part of the job to a professional.
Step 3: Clay the paint and use the baggie test
A clay bar, mitt or towel lifts what chemicals leave behind: overspray, sap, industrial fallout and rail dust. You do not have to guess whether it is needed. After washing, put your hand inside a thin sandwich bag and glide it over the paint. Paint that feels rough, like mild sandpaper, is contaminated and will benefit from clay, and washing alone cannot remove things like overspray, pollution, sap and rail dust.
A few habits make claying safer:
- Keep the surface slick with clay lubricant so the clay glides and does not mar the paint.
- Fold the clay often so you are always using a clean face. If you drop it, throw it away.
- Work one small section at a time, then re-test with the bag.
- Keep going until the paint feels uniformly smooth. A manufacturer’s guide also advises checking by touch.
Rinse and dry the car afterward. Moisture trapped in mirrors, trim edges and panel gaps can drip out later, so use a leaf blower or compressed air if you have one.
Step 4: Decide how much polishing the car needs
Polishing is the step that most separates a good coating job from a disappointing one, and it is also where the most can go wrong.
Why polish before coating at all
Polishing removes swirls, scratches and water spots that would otherwise be locked in under the coating. One detailing supplier notes that a one-step polish is often enough, even before a professional-grade coating.
How much correction is right
There is no single answer. One coating maker says prep can range from a full decontamination wash and a three-step polish to a one-step polish with a wipe-down, depending on the vehicle’s condition. Lighter prep is typical for brand-new or rarely contaminated cars.
A rough guide to the decision:
- New car, delivered recently: often needs wash, decontamination and a light polish or a simple wipe-down. Dealer lots and transport can still leave contamination and marks, so do not assume it is perfect.
- Daily driver, a few years old, mild swirls: usually a one-step polish after decontamination.
- Older or neglected paint, deep scratches, oxidation: often a multi-step correction, which takes a day or more.
The other limit is paint thickness. A manufacturer’s guide advises inspecting under proper lighting and using a paint thickness gauge so correction stays within a safe range. Clear coat is thin, and every pass of the polisher removes a little of it.
Where to bring in a professional
Machine polishing, and anything heavier such as wet sanding, can burn through clear coat or leave haze and holograms when done without experience. Wet sanding and multi-step paint correction are professional work, and so is applying the coating itself on a car you care about. If the car is a collector piece, a fresh respray, or has single-stage or thin paint, treat that as a reason to book a pro, not to try a first polish on it.
The same goes for motorcycles, where tanks and fairings have little clear coat to spare. See how a pro approaches motorcycle paint correction for the workflow.
Which polish to use
The answer depends on the paint and the defects, not a single “best” product. A fine finishing polish with a soft pad suits light swirls. A cutting compound is for deeper defects and is normally followed by a finishing polish. Choose a polish from a reputable maker that is designed for automotive clear coat, and follow its directions. A professional will test on a small area first to find the least aggressive combination that works.
Step 5: Remove polishing oils with a panel wipe
Polishing leaves oils and fillers that can hide defects and block bonding. Coating directions are consistent here: one maker’s published instructions say to remove all polish oils with a panel prep product for optimal bonding and durability. Another explains that the coating needs direct contact with the paint, so use a suitable panel prep product on a clean microfiber and work one section at a time.
A panel-by-panel routine looks like this:
- Mist the panel prep onto a clean microfiber towel or the panel.
- Wipe in straight, overlapping passes.
- Flip to a dry, clean side and buff until dry and streak-free.
- Use dedicated towels and swap them as soon as they feel loaded.
- Go over the car a second time. One professional prep guide recommends going around the car twice.
Is isopropyl alcohol enough?
Many DIYers use diluted isopropyl alcohol (IPA). Some professional workflows use high-purity IPA or a dedicated panel wipe as a final strip, and say that trace oil left behind can stop the coating from bonding to the clear coat and lead to early failure. A coating maker’s technical sheet, however, says IPA does not fully degrease the surface and recommends its own prep product before coating. The safe move is to use whichever wipe the coating’s directions name.
If you are ever removing an old coating and checking the surface afterward, our article on preserving clear coat while removing ceramic coating covers verifying with IPA.
Step 6: Check the surface and the conditions
A perfectly prepped car can still be ruined by the wrong day. Before applying, confirm the paint is clean, dry, cool and residue-free, and check panel gaps, mirrors and trim edges for trapped water.
Coating makers publish slightly different comfort zones, which is a sign to follow the directions on your specific product:
| Source | Temperature | Humidity | Other |
|---|---|---|---|
| Undrdog | 60 to 75°F | Under 60% | Indoors or out of direct sun, dust-free air |
| SE Auto Products | 50 to 80°F | Under 60% | Out of sun, garage preferred, same conditions for 24 to 48 hours of curing |
| DoorstepHQ | 50 to 75°F | 40 to 70% | Work in shade, avoid wind, panel should feel cool to the back of your hand |
The overlap is easy to remember: a shaded or indoor space, mild temperatures, moderate humidity, no wind, and a panel that is not warm from the sun. That is a major reason many owners choose a pro with a controlled workspace or a well-prepared on-site setup.
Timing after application
Prep ends where application begins, but the timing is worth knowing before you book. Directions vary by product. One manufacturer says to wait up to 10 minutes in climate-controlled conditions before wiping, and start removal within 1 to 2 minutes in hot or humid conditions. It also states its coating is water resistant within 12 hours and fully chemically cured in 7 days. Another guide advises following the visible flash, not a fixed timer. Spray coatings can need only 2 to 5 minutes or more to set up, and heat and humidity speed that up.
Adjusting prep for different situations
New or lightly contaminated cars. Wash, run the baggie test, clay if needed, wipe down, and do a light polish if the paint shows marks under good lighting.
Heavily contaminated cars. Add iron removal and tar removal, possibly a second claying pass, and expect a longer correction stage.
Recent glass or body work. If the windshield was replaced recently, the adhesive has its own urethane cure times, so ask the glass installer what is safe before washing, claying or taping around it. Fresh paint also needs time to cure before it is polished or coated, so ask the body shop.
Boats. Marine gelcoat is not automotive clear coat, and registration numbers and decals complicate things. If your boat has vinyl lettering, read about applying decals before ceramic coating so the edges do not lift. For marine work, a dedicated marine detailer such as Swift Marine Boat Detailing in Hialeah, FL is the better route than a car-focused installer.
DIY prep or hire a professional?
Washing, drying, a baggie test and light claying are reasonable weekend tasks. Hazardous chemical work, machine polishing, wet sanding and the coating application itself are where a trained detailer earns the fee, because mistakes are costly and hard to reverse.
A mobile detailer who comes to your home or workplace can do the full sequence on site. When you compare detailers, ask:
- What prep is included, and is the correction step one-stage or multi-stage?
- Do they measure paint thickness before polishing?
- Which coating do they use, and what do its directions say about conditions and curing?
- What does the warranty cover, and what care does it require from you?
- Where will the work happen, and how do they control sun, dust and humidity?
The answers tell you more than a price alone. Prices vary by region, vehicle size and correction level, so request written quotes for the same scope.
Find a local detailer for prep and coating
MobileDetailing.io is a free directory for vehicle owners. You can search by location, compare local detailers that list ceramic coating and paint correction, and send a quote request without paying us anything. To get started, use the local quote request, or browse the MobileDetailing.io directory.
For a sense of what listings look like, you can view profiles such as Minor Details Automotive in Draper, UT, VIP Auto Detailing in Cary, NC and Nine22 Detailing in Conroe, TX. Each lists its own services, so confirm what prep is included when you request your quote.
FAQ
What should I do before ceramic coating my car?
Wash it, remove bonded contamination with an iron remover and clay, correct the paint as needed, then wipe each panel with a panel prep product. Check that the car is clean, dry and cool, and that conditions are right for your coating. Hand wet sanding, heavier correction and the coating itself to a professional.
Do I have to polish before ceramic coating?
Usually yes, at least lightly. Polishing removes swirls and scratches that the coating would otherwise lock in. Brand-new or rarely contaminated cars may need only a one-step polish or a wipe-down, while older paint can need multiple stages. Have a detailer inspect the paint under good light and measure thickness first.
How do I know if my paint needs clay?
Wash and dry the car, put your hand in a thin plastic bag and glide it over the paint. If it feels gritty or rough, there is bonded contamination and claying will help. Keep claying and re-testing until it feels uniformly smooth.
How long do I wait before wiping off the coating?
It depends on the product, temperature and humidity. Directions range from 1 to 2 minutes in hot, humid weather to about 10 minutes in cool, controlled conditions, and many guides say to follow the visible flash. Read the directions for your coating, or ask the installer.
Sources
- How to Prep a Vehicle for Ceramic Coating (FEYNLAB)
- Original Ceramic Instructions (FEYNLAB)
- Ceramic Coating for Pros: The Prep (Proje Products)
- How to Prepare Paint for a Ceramic Coating (Gtechniq, Ask a Pro)
- Clay mitt or towel versus the traditional bar (Hagerty)
- Applying a Ceramic Coating, the GYEON Way
- GYEON technical facts and application tips (PDF)
- Paint Correction Before Ceramic Coating: Pro 2026 Guide (LA Wrap & Tint School)
- Do I Need to Polish Before Ceramic Coating? (Dr. Beasley’s)
- How to Prep Your Car for Paint Correction or Ceramic Coating (Chemical Guys)
- The professional ceramic coating workflow (DetailerBase)
- How to Apply Ceramic Coating Without Streaks or High Spots (Undrdog)
- How to Apply Ceramic Coating (SE Auto Products)
- Ceramic Coating Without a Shop (DoorstepHQ)
- Pro Directions (NXTZEN Ceramic Coatings)
- The Fastest Way to Ceramic Coat a Car (Adam’s Polishes)
- Windshield Urethane Adhesive: Types, Primer and Cure Times
- Boat Owners: Apply Decals Before Ceramic Coating
Recommended
- Preserve Clear Coat While Removing Ceramic Coating, Verify With IPA
- Test Before You Recoat: 4 Step Ceramic Coating Maintenance
- Lab Claims: Ceramic Coating Lifespan for Car Owners, 1–7+ Years
- Matte Paint Ceramic Coating: What Works and What to Avoid
MobileDetailing.io provides general educational information. Products, surfaces and vehicle finishes vary. Follow manufacturer instructions and consult a qualified detailing professional before using abrasive processes or chemical treatments.