Headlight Restoration: Cost, Methods and When to Replace
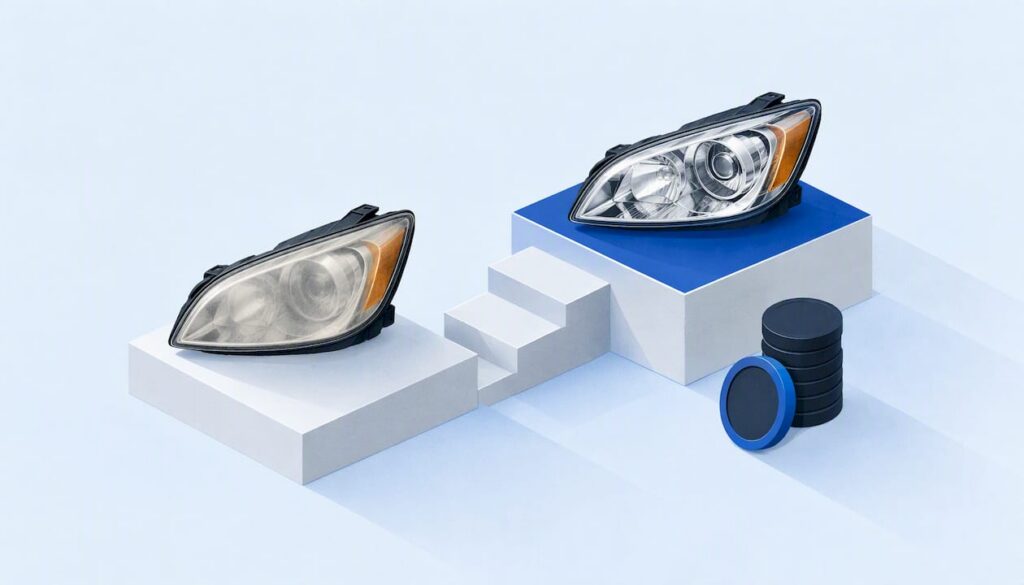
Headlight restoration removes the oxidized outer layer of a cloudy plastic lens, polishes what is underneath, and seals it with a UV-blocking coating. Done well, it makes the lens clear again for roughly $50 to $150 at a professional or $10 to $50 in a DIY kit. It is not permanent, and it is not right for every lens. This guide covers how the process works, what to expect to pay, what to skip, and how to decide between doing it yourself, hiring a mobile detailer, or replacing the headlight assembly.
Table of Contents
- Why headlights turn cloudy in the first place
- What proper restoration involves
- Home remedies: what to skip
- DIY kit, mobile detailer, or replacement
- When a mobile detailer is the better call
- How long restoration lasts and how to extend it
- Restoration versus replacement: a quick decision guide
- Find a mobile detailer near you
- Frequently asked questions
- Sources
Why headlights turn cloudy in the first place
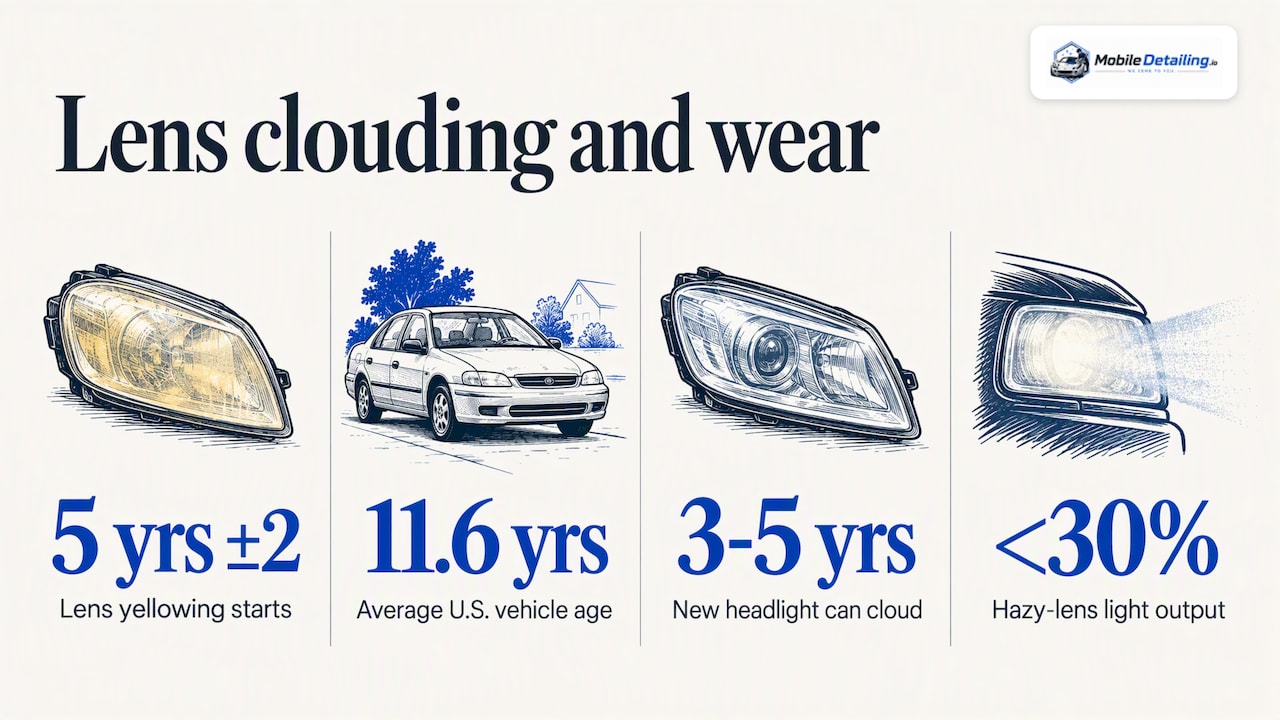
Modern headlight lenses are polycarbonate plastic, not glass. Manufacturers cover the plastic with a factory UV-resistant hard coat, and that coat is what wears out. Sun, heat, road grit, and harsh chemicals break it down, and the plastic underneath then oxidizes into a yellow or foggy film.
AAA’s research on headlamp lens deterioration found that polycarbonate lenses begin to yellow and show other signs of wear at around five years of age, give or take two. The same report notes that the average registered vehicle in the U.S. is 11.6 years old, which means a lot of cars on the road are already past that point. AAA’s own consumer guide says a brand-new headlight can cloud in as little as three to five years.
This is a safety issue, not only a cosmetic one. According to the AAA findings summarized in our research, badly yellowed or hazy lenses can put out less than 30% of the light of a new lens. Less light on the road means you see hazards later, and oncoming drivers can also be hit with scattered glare.
Cars parked outside in sunny states tend to cloud sooner than garage-kept cars. That is a general pattern, not a guarantee, and the research we reviewed does not put a number on it, so treat your own lenses as the evidence: if they look dull, yellow, or hazy when the car is clean, they are working below their potential.
What proper restoration involves
The steps are the same whether a pro or a kit does the work. What differs is the skill, the abrasives, and the quality of the final seal.
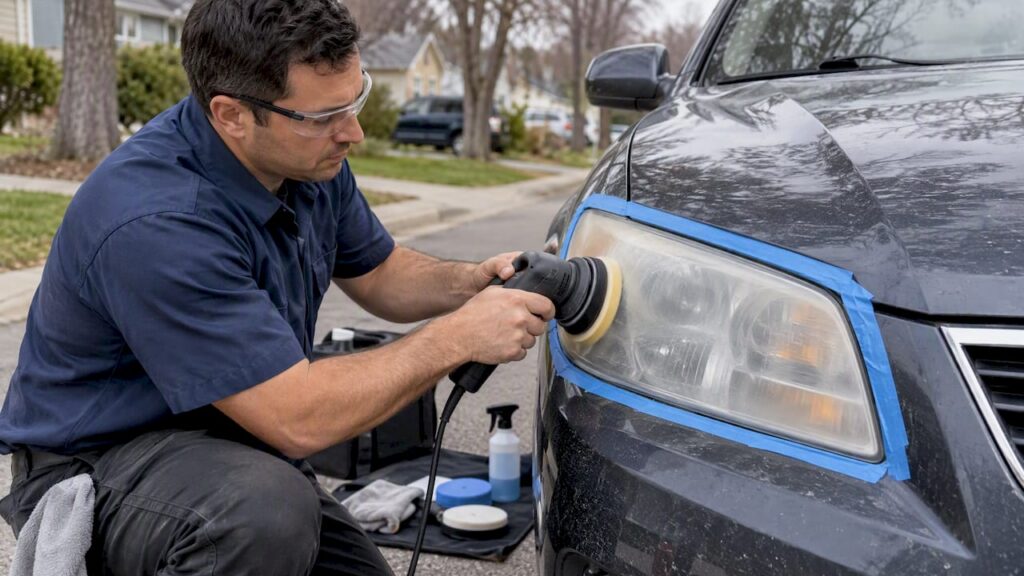
- Clean the lens. Wash away dirt and road film so grit does not get dragged across the plastic during sanding.
- Mask the surrounding paint. Painter’s tape around the lens protects the finish, which sanding can easily scuff. AAA’s guidance on lens work stresses this step.
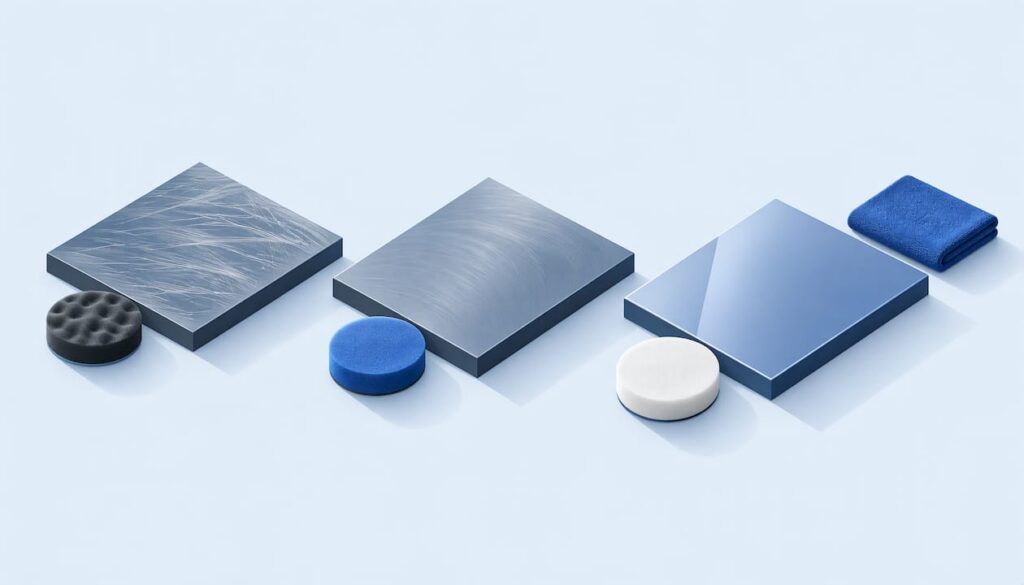
- Wet sand in stages. Car and Driver describes progressively finer grits, often from around 2000 to 3000, to remove the oxidized layer. Keeping the lens wet is part of getting an even finish. Kits that skip sanding rely on chemical wipes instead.
- Polish. Compound removes the sanding haze and brings back clarity.
- Apply UV protection. This is the step that decides how long the result lasts. A dedicated UV-blocking sealant or ceramic-type coating replaces the factory hard coat you just removed.
- Check the aim. AAA notes that headlamp aim should be checked after any work, because even small shifts can affect how well you see and how much glare other drivers get.
Patience matters most during sanding. Skipping grits or leaving an uneven surface can scatter light and shorten the life of the finish, according to the detailers and reviewers behind our research.
Why the sealant is not optional
Sanding strips the last of the factory protection. Without a new UV layer, the bare plastic starts oxidizing again. Morton’s guidance on cloudy headlights says yellowing typically returns within a year when proper protection is not reapplied. Consumer Reports makes the same point: restoration is not a permanent solution, even though kits make a noticeable difference and cost far less than new headlights.
Home remedies: what to skip
Search results are full of quick fixes. Two come up constantly.
- WD-40. It is a petroleum-based lubricant, not a cleaner. It can make a lens look better for a short time by filling fine scratches, but it does nothing to protect the plastic, and it may speed up long-term degradation.
- Magic Eraser. These melamine sponges act as a micro-abrasive. They can lift surface dirt, but they leave the lens with no UV protection, so haze comes back quickly.
Both points come from Morton’s overview of cloudy headlight fixes. The same logic applies to toothpaste and baking soda pastes: they are mild abrasives with no sealing step. If you want a lasting result, you need abrasion, polish, and a UV seal, not just one of the three.
DIY kit, mobile detailer, or replacement
There are three realistic paths. Here is how they compare.
| DIY kit | Professional or mobile restoration | Replacement | |
|---|---|---|---|
| Typical cost | $10 to $50 | $50 to $150 per pair | AAA’s research puts professional restoration near $77 per pair against OEM dealer replacement that can exceed $400 |
| Your time | 30 to 90 minutes, plus drying | Usually the length of a short appointment | Varies; some vehicles need bumper work |
| Skill needed | Moderate; sanding near paint is the risk | None on your side | Depends on the vehicle |
| Best for | Mild to moderate haze, comfortable DIYers | Heavier oxidation, newer or high-value vehicles, people short on time | Cracked, pitted, moisture-filled, or previously restored lenses |
The time estimates in the table are general expectations, not figures from the sources. Prices vary by region, vehicle, and how bad the lens is, so use the ranges as a starting point for budgeting.
How well does restoration actually work?
AAA’s research found that restoration, whether professional or DIY, typically recovers about 70% to 90% of a lens’s condition, while replacement with OEM or quality aftermarket parts restores roughly 83% to 100% of original output. That gap is why replacement is the better answer when the damage goes deeper than the surface.
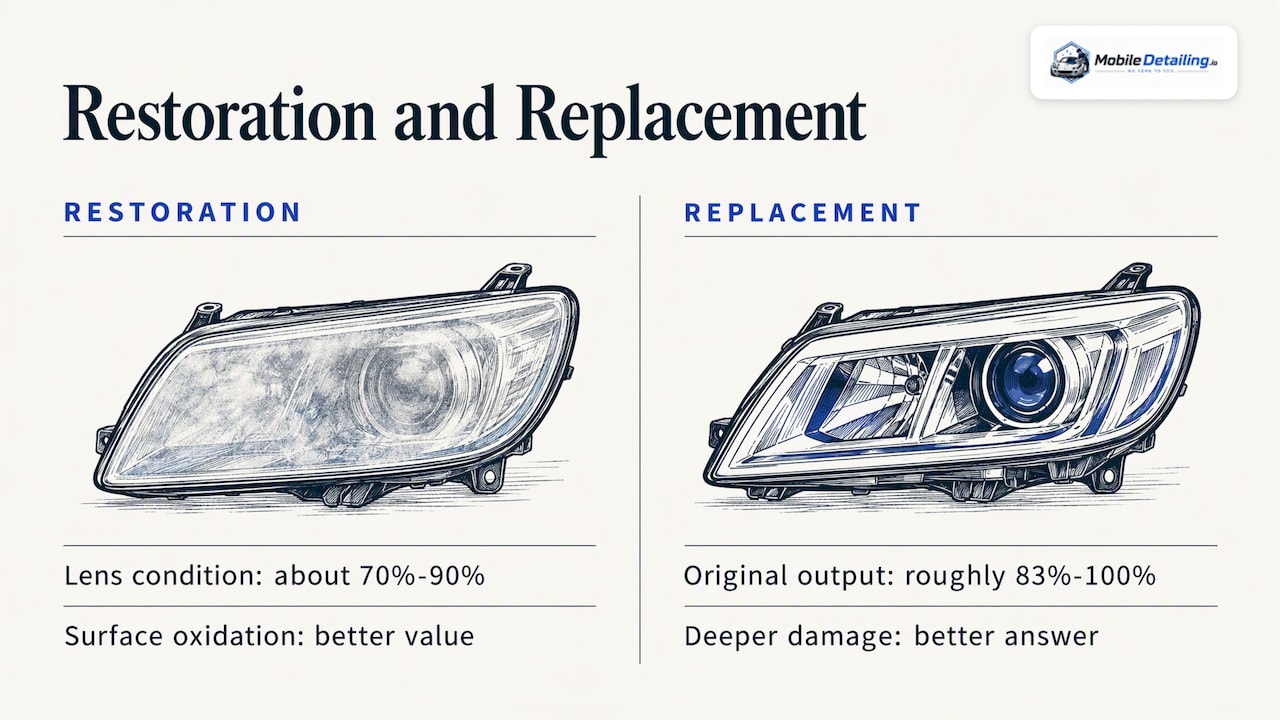
Note what that comparison means: a good restoration gets you most of the way for a fraction of the price, which is why Consumer Reports calls kits a better value than replacing the lamps when the problem is surface oxidation.
Manufacturer claims versus independent testing
Kit makers advertise “like new” results, and some products do deliver. Cerakote and Chemical Guys, for example, sell multi-step systems with a ceramic-type UV layer. Their packaging and product pages are manufacturer claims. For independent evidence, look to hands-on reviews such as Road & Track’s test of the Cerakote kit and Car and Driver’s reporting on whether kits improve night vision. Reviews describe results on specific test vehicles, so your own lenses may respond differently.
The “good enough” test for DIY
A kit makes sense if all of these are true:
- The lens is hazy or yellow but smooth to the touch when clean.
- There are no cracks, deep pits, or condensation inside the housing.
- You are comfortable masking off paint and sanding carefully.
- You will reapply protection on a schedule.
If you hesitate on the sanding part, that hesitation is useful information. Mistakes happen at the edge of the lens, where an aggressive sanding pass can scuff clear coat or trim. Paint damage costs more to fix than the restoration saves.
When a mobile detailer is the better call
A mobile pro comes to your home or workplace, so you do not lose an afternoon at a shop. That is a real advantage for busy owners, but convenience is not the only reason to hire one.
- Heavy oxidation. Deeply yellowed lenses need more aggressive, more controlled sanding than most kits are built for.
- Newer, leased, or high-value vehicles. The cost of a mistake is higher, and the paint around the lens is worth protecting.
- Several issues at once. If the car also needs an interior cleanup or exterior wash, a detailer can bundle jobs. Our guide to what mobile detailing is and how appointments work explains the format.
- A coating on top. Ceramic coatings and paint correction are best left to professionals, and the same goes for any job involving strong chemicals.
Mobile service is not unique to detailing, either. Many drivers already have other glass and lens work done in their driveway, such as mobile windshield repair. The same logic applies: if the work can be done safely on site, you save the trip.
Questions to ask before you book
Good detailers are happy to answer these, and the answers tell you more than a price does.
- Do you wet sand, or do you use a polish-only method? On heavily oxidized lenses, polish alone usually will not do it.
- What UV protection do you apply, and how often should it be refreshed?
- Do you mask the paint around the lens?
- Does the price cover both headlights, and what is the policy if haze returns early?
- Can you show photos of previous headlight work?
We do not set prices or warranties for the detailers listed on MobileDetailing.io, so confirm those details in writing with whoever you hire. For general price context across services, see our mobile detailing cost breakdown and the guide on how detailers price their work.
How long restoration lasts and how to extend it
There is no honest single number. Results depend on the quality of the sealant, how much sun the car sees, and how it is washed. Experts quoted by Consumer Reports describe restoration as temporary, because the factory hard coat is gone, and recommend reapplying a UV protectant every few months to keep the lens clear.
Habits that help:
- Wash with a pH-balanced car shampoo. Motor1’s report relays the manufacturer advice that regular cleaning stops buildup and that prevention beats restoration.
- Park in a garage or shade when you can, which cuts UV exposure.
- Reapply a UV sealant or lens-safe protectant on a regular schedule, following the product’s directions.
- Avoid harsh solvents and abrasive sponges on the lens.
If you restore the lens and ignore protection, expect to repeat the job. Lenses that have already been restored more than once, or that show cracks or pitting, are usually better replaced. Consumer Reports notes that replacement is the safer path for severely deteriorated lenses.
Restoration versus replacement: a quick decision guide
Restore when:
- The surface is hazy or yellow but intact.
- The housing is dry inside and the lens has no cracks.
- You want a low-cost fix that improves both looks and light output.
Replace when:
- The lens is cracked, deeply pitted, or has moisture trapped inside.
- The haze is on the inside of the housing, where sanding cannot reach.
- It has been restored before and clouded again quickly.
- Your state inspection or a mechanic flags the lamp as unsafe.
If you are unsure, a detailer can look at the lens and tell you whether it is a restoration candidate. A mechanic or dealer can price the replacement side, and for some vehicles the housings are far costlier than average, which is where AAA’s figure of more than $400 at the dealer comes in.
Find a mobile detailer near you
MobileDetailing.io is a nationwide directory where you can search by location, compare local mobile detailing businesses, and see their services, photos, and reviews. Using it is free for vehicle owners. Browse listings from the MobileDetailing.io home page, or send details of your car and the work you want through our free quote request form to hear back from local pros.
When you describe the job, mention the year and model, whether the haze is inside or outside the lens, and whether you want it bundled with an exterior detail. Our guide to exterior car detailing pros shows what to look for in a listing. If you want to compare several quotes first, this walkthrough on getting 2 to 3 estimates explains how.
Headlight restoration may not appear as its own line on every detailer’s profile, so ask whether it is offered when you request quotes.
Frequently asked questions
Does WD-40 really restore headlights?
Not in any lasting way. It is a petroleum-based lubricant that can temporarily hide fine scratches, but it offers no UV protection and may speed up long-term degradation. A proper sand, polish, and seal process is the better route.
How much does it cost to restore a headlight?
Car and Driver’s reporting puts DIY kits at about $10 to $50 and professional service at about $50 to $150. AAA’s research estimated a professional restoration at around $77 per pair. Your quote will depend on your vehicle, your location, how oxidized the lenses are, and whether the technician comes to you.
Does a Magic Eraser work on headlights?
It may lift surface grime for a moment, but it is a micro-abrasive with no UV protection. Haze tends to return fast, and the scuffing can add to the problem. Use a proper kit or hire a professional instead.
What takes cloudiness out of headlights?
Removing the oxidized layer by sanding and polishing, then sealing the lens with a UV-blocking coating. Cleaners alone cannot fix it, because the damage is in the plastic surface. If the cloudiness is inside the housing, replacement is usually the only fix.
Sources
- AAA: Headlamp Lens Deterioration
- AAA Via: How to Restore Headlights
- Car and Driver: Best Headlight Restoration Kits Tested
- Car and Driver: Do Headlight Restoration Kits Improve Night Vision?
- Consumer Reports: Do Car Headlight Restoration Kits Really Work?
- Morton’s on the Move: The Secret to Restoring Cloudy Headlights
- Motor1: How Do You DIY Headlight Restoration?
- Road & Track: I Tried the Cerakote Headlight Restoration Kit
Recommended
- $500–$2,500+: Paint Correction Cost U.S. Owners Pay and What to Ask
- Save Your Clearcoat: Pro Motorcycle Paint Correction Workflow
- Daily Drivers: Test Spot to See If One Step Paint Correction Works
- Car Owners: Diagnose Water Spots First, Try a 30–60s Vinegar Fix
MobileDetailing.io provides general educational information. Products, surfaces and vehicle finishes vary. Follow manufacturer instructions and consult a qualified detailing professional before using abrasive processes or chemical treatments.