Stop Clearcoat Damage: 3 Safe Car Emblem Removal Ways or Call a Pro
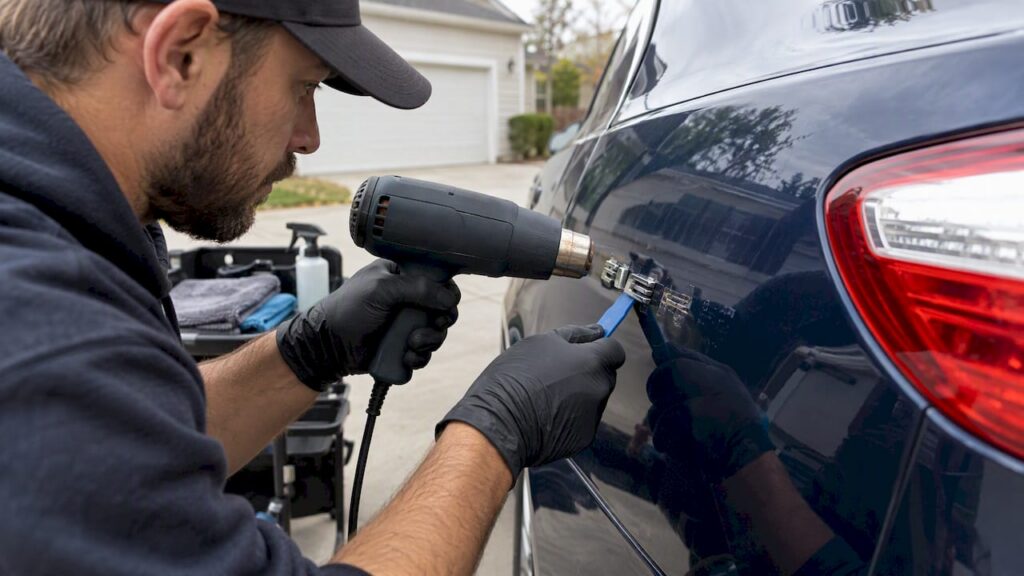
The safest common approach to emblem removal is to warm the badge, cut behind it with fishing line or monofilament, then clear the leftover glue with a paint-safe adhesive remover and reapply protection to the bare spot. Never remove or tamper with a VIN plate or a required regulatory label, which is restricted under federal law. If you find structural adhesive, visible clearcoat damage, or ghosting that will not fade, stop and bring the car to a professional.
Table of Contents
- What tools do you need for safe emblem removal?
- How do you remove a car emblem step by step?
- How do you clean up leftover adhesive after removal?
- Why does ghosting happen and how do you avoid it?
- When should you hire a professional detailer instead?
- How can MobileDetailing.io help you find the right detailer?
- Get a local quote for adhesive cleanup or paint correction
- FAQ
- Sources
What tools do you need for safe emblem removal?
A short list of paint-friendly tools makes the difference between a clean job and a scratched hood. Monofilament fishing line, a hair dryer or a heat gun set low, plastic pry tools or a plastic razor blade, microfiber cloths, isopropyl alcohol, a trusted adhesive remover such as 3M™ Adhesive Remover, and a bucket of car soap cover most jobs.
What you should leave in the garage matters just as much. Metal scrapers, utility razor blades, and coarse abrasive pads are the tools most likely to gouge clearcoat, and industry practitioners warn against them directly because the damage they cause is usually permanent.
- Monofilament or fishing line for cutting through factory adhesive.
- A hair dryer or low-heat gun to soften the glue without scorching paint.
- Plastic pry tools or a plastic razor blade instead of metal.
- Isopropyl alcohol and a paint-rated adhesive remover for residue.
Before starting, test any solvent on a hidden spot, like the inside of a door jamb, and work in the shade with gloves on and good ventilation if you are using chemical removers.
Pro Tip: Keep a second microfiber cloth dry and ready. Adhesive removers evaporate fast, and wiping immediately after application keeps the solvent from sitting on the paint longer than it needs to.
How do you remove a car emblem step by step?
Most emblems come off with one of three approaches, depending on how they were originally attached. Work slowly. Rushing is what turns a ten-minute job into a paint-correction appointment.
- Heat and fishing line: Warm one edge of the emblem for 20 to 30 seconds, then slide a loop of monofilament behind it and saw gently side to side while keeping steady, even tension.
- Hair dryer and plastic pry: Heat the entire emblem evenly, then work a plastic pry tool into a corner and lift slowly while your other hand supports the paint around it.
- Stubborn adhesive: Repeat short heat cycles and apply small amounts of adhesive remover between passes rather than forcing a scraper through resistant glue.
Factory emblems, usually held with a foam adhesive pad, tend to respond well to the fishing-line method because the line slices cleanly through the foam without touching the paint. Aftermarket emblems are a different story. Some are mounted with high-strength structural adhesive that resists both heat and gentle prying, and forcing the issue often means trading a stuck badge for a scratched hood.
If the emblem snaps apart mid-removal, stop pulling on the remaining piece and switch to heat plus a thin pry tool at a new angle. If adhesive remains thick and rubbery after a few line passes, more heat usually softens it faster than more force. If you notice the paint dulling, softening, or lifting at the edges, stop immediately. That is your signal that the clearcoat is compromised and further DIY work will likely make it worse.
Pro Tip: Work at a 30-45 degree angle rather than straight up. This spreads the pulling force across the glue line instead of concentrating it at one lift point.
How do you clean up leftover adhesive after removal?
Start mild. Warm the glue residue slightly, then try isopropyl alcohol or plain soapy water on a microfiber cloth first since many residues lift with nothing stronger. When that is not enough, move to a dedicated paint-safe product like 3M’s adhesive remover, which the manufacturer states is formulated to dissolve adhesive residue on most cured automotive finishes when used according to the label.
- Test any new solvent on a small, hidden panel section first.
- Work in the shade so the product does not flash off before it loosens the glue.
- Apply a small amount, let it sit briefly, then wipe immediately rather than scrubbing.
- Avoid any cleaner not rated for automotive clearcoat.
Adhesive removers do not discriminate between glue and your paint’s protective layer. 3M notes that its remover formula is designed to break down adhesive bonds, which means it strips wax and sealant from the treated area along with the residue it is meant to clear.
Once the panel is clean, wash and dry the spot, then reapply protection to guard against winter’s worst messes. A fresh coat of wax or sealant covers the bare paint temporarily, though if you want longer-lasting coverage, ceramic coating tends to outlast traditional wax by a wide margin and is worth discussing with a professional installer for that one panel.
Why does ghosting happen and how do you avoid it?
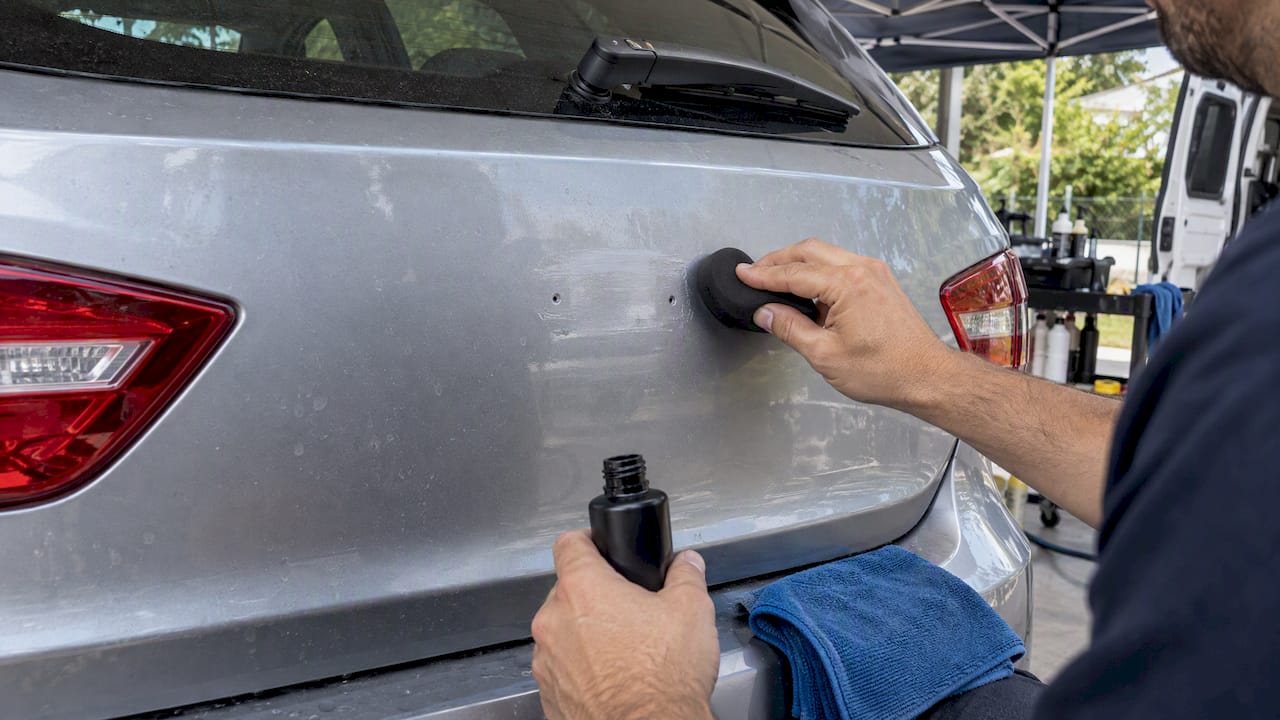
Ghosting is the faint outline an emblem leaves behind once it is gone. It happens because the paint underneath was shielded from sun and weather while the rest of the panel aged normally, so you end up with a visible shape where protected and exposed paint meet. JTape’s guidance on the issue notes that older vehicles show this more often simply because there has been more time for the surrounding paint to fade or dull.
- Use gentle, even heat rather than concentrated blasts in one spot.
- Never scrape with metal tools, which can etch a second, worse outline into the clearcoat.
- Keep solvent exposure minimal and limited to the adhesive area itself.
- Stop immediately if the paint feels soft, sticky, or starts to dull under your cloth.
Light machine polishing sometimes blends a mild ghosting outline into the surrounding paint. More stubborn cases, especially where the fading is pronounced or the clearcoat has already been scuffed, usually call for professional paint correction rather than another round of DIY solvent and polish.
When should you hire a professional detailer instead?
Some situations are not worth the risk of doing yourself. If you find high-strength structural adhesive that will not budge with heat and gentle prying, visible gouges or scratches in the clearcoat, ghosting that persists after light polishing, or anything resembling a VIN plate or required regulatory sticker, it is time to call a professional.
- Ask about their experience with adhesive cleanup and emblem removal specifically.
- Request paint correction, which may include compounding or wet sanding for deeper marks.
- Ask whether they reapply wax, sealant, or ceramic coating after solvent work.
- Confirm they will not touch VIN plates or any federally regulated labels.
A local mobile detailing provider can usually assess the panel in person and tell you within minutes whether it is a quick fix or a job for paint correction.
How can MobileDetailing.io help you find the right detailer?
MobileDetailing.io operates as a nationwide directory and lead-generation platform connecting vehicle owners with local mobile detailing professionals, including services like adhesive cleanup, paint correction, and ceramic coating. When a DIY emblem job turns into more than a quick glue cleanup, comparing nearby listings, reading reviews, and sending a quote request through the platform is a straightforward way to find someone equipped to finish the job safely.
Get a local quote for adhesive cleanup or paint correction
We built MobileDetailing.io so vehicle owners can compare local mobile detailing professionals by service, location, and reviews instead of guessing which shop can handle a tricky adhesive job or clearcoat touch-up. If your emblem removal left behind ghosting, a dull patch, or adhesive that will not fully release, these are types of issues that professional detailers often handle alongside paint correction and ceramic coating.
Search by your city to compare providers, check what services each one offers, and see reviews from other owners before you commit. When you are ready, request a local quote and describe the issue, whether it is leftover residue, a faint outline, or a scratch that needs correction, so detailers in your area can tell you what it will take to finish the job right.

FAQ
What is the easiest way to remove car emblems?
The easiest common method is warming the emblem with a hair dryer, then sliding fishing line or monofilament behind it and sawing gently to cut through the adhesive. This works well on factory emblems with foam adhesive pads; aftermarket badges with structural glue often need more heat and patience.
Is it legal to take off car emblems?
Removing decorative emblems is not restricted, but tampering with a VIN plate or a required regulatory label is prohibited under federal law. Stick to badges and trim pieces that are purely decorative and leave any identification or compliance stickers untouched.
How much does debadging a car cost?
Pricing for professional debadging and any related paint correction depends on the vehicle, the adhesive type, and the detailer, so it is best to request a local quote for an exact figure. Costs can vary widely between a simple badge removal and a job that also requires clearcoat correction.
What is a good tool for removing car emblems?
Monofilament fishing line paired with a low-heat hair dryer is a reliable combination for most factory-installed emblems. Plastic pry tools work well as a backup for stubborn corners, while metal scrapers and razor blades should be avoided since practitioners warn they frequently cause irreversible clearcoat damage.
Sources
- 18 U.S. Code § 511 – Altering or removing motor vehicle identification numbers | LII / Legal Information Institute
- 3M™ Adhesive Remover | 3M United States
- Car body ghosting: what is it and how to prevent & fix | JTape
- How to debadge — Family Handyman
Recommended
- Stop Before You Strip Clear Coat: Clay First Car Overspray Removal
- Fix Sap Before It Etches: Safe Sap Removal for U.S. Car Paint
- Car Owners: Diagnose Water Spots First, Try a 30–60s Vinegar Fix
- Finish Clay Bar Treatment in 45–120 Minutes: Safe Test Spot Steps for DIYers
MobileDetailing.io provides general educational information. Products, surfaces and vehicle finishes vary. Follow manufacturer instructions and consult a qualified detailing professional before using abrasive processes or chemical treatments.